Thursday, September 29, 2011

Halloween Frames and Petal Cards

Good Morning!

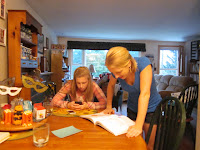
About 2 months ago I decided to combine two of my passions, teaching and paper crafting, by teaching paper crafting classes in my home. I offer the same class twice a week to help accomodate everyone’s busy schedule. Attendance varies from week to week as friends select paper crafts that fit their needs and interests.

The first week’s class was called Tool School. In that class everyone was given the opportunity to "play" with some of the tools we would be using in future classes. The following week we created birthday cards because those seem to be the type of cards that are in the greatest demand. This week everyone made an altered Halloween frame and a petal Halloween card.

Everyone used the same black frame, but how that frame was decorated was left up to them. All of my Halloween paper punches were on the tables along with an assortment of Halloween papers and embellishments. The participants in Tuesday night’s class mostly chose to follow my sample, but also added some touches of their own.

That's Jill hiding behind her frame.  Her daughter is getting married next month.

Meet Janet, proud grandmother of Sadie


Here's Peggy!  Peggy will be surprising her family with her creations. 
When the frames were completed everyone selected their own Halloween papers and used some templates from a Klutz press book to create a petal card. There were 3 petals in the cards. Messages and embellishments can be added to the petals.


Front of folded petal card


Back of folded petal card.

First petal is now open.


Second petal is open.

Third petal is open.  EEK!  A spider!
Off for a day of paper crafting shopping with Janet! 

Have a great day!
Carol


Monday, September 26, 2011

I Spy Button Frames

Hi Everyone!

I finally have time to share some crafts with you. Earlier this year PaperCrafts magazine featured an awesome frame with buttons created by Jessica Witty on the cover of their special issue called 350 Cards & Gifts. I loved her idea so much that I made one just like it and shared it with you last March at this link 

Http://carolhartery.blogspot.com/2011/03/framed-buttons.html

My children and my students always loved I Spy books so I decided to use some buttons to create some I Spy frames. I removed the glass from a 12" frame and covered the mat with a piece of "Boo" paper from SEI’s "Spooks" collection for my Halloween I Spy frame. Look at the photograph. Do you see the g-g-g-ghosts?


I filled the space in the center of the mat with a variety of Halloween Favorite Findings buttons and some orange and black buttons from my stash.

I used a piece of "Snow Angels" paper from SEI’s "Kris Kringle" collection for my Christmas I Spy frame. The Santa embellishment is from SEI’s Kris Kringle’s Titles.


I’d like to warn you that this isn’t an inexpensive project because you will be using "special" buttons, but you will be creating something that can be a display and can also be a game. "I am thinking of something that is wrapped in bandages".

By they way the SEI products that I used all happen to be on sale right now at www.shopsei.com
Also please visit the SEI Link Party on their blog at <a href="http://seilifestyle.blogspot.com"><img src="https://blogger.googleusercontent.com/img/b/R29vZ2xl/AVvXsEhBXZLdmw6ePV9MwCrIkIGYjGSokGbOsrNLbQmC6C-ffa84QnnLnVRHaECYsW4BHqSfdhwxrpVRbCZbptY2la49lfG2SPK4Xm1f63_kgyN5KjYEzEAqd5BxCNAtOkxFd8aQem_JHAlhxbg/s1600/link.jpg" /></a>

Have a great night!
Carol

Friday, September 16, 2011

Fall and Thanksgiving Cards

Hi Everyone!

I've been working on some fall themed cards that can be used for Thanksgiving or really any occasion.  For the time being I've left most of them without a message so that I can add the message I want when I plan to use the card.  Some of these cards will look similar to ones I created last fall.  I've updated them with new papers and may have changed the embellishments or accessories that I added to the card. 

The papers that I used on all of today's cards are from the dcwv Harvest Gathering Matstock.  All of the papers in this collection are gorgeous and I may just have to pick up another pad while it's still in stores. 

The bramble wreath stamp from Memory Box is one of my favorite stamps and I know my friend Toni loves it too.  You can stamp anything you want onto it to make it be seasonal or for a special occasion or holiday.   I used a leaf paper punch from Marvy Uchida to punch out some colorful fall leaves and adhered them to the wreath.  The cranberry colored bow is made from some thin wired ribbon.  I love using wired ribbon because it holds it shape so well. 

I punched out more of those same leaves and added them to this quilted card.  Each quilt square is one inch.

The Autumn Tree Landscape is a new stamp from Memory Box.  I chose to keep my trees bare on this card, but you could add color to them to give them some foliage

You've read about our fascination with the turkeys who visit our yard each day.  They are still around, but now we just see 2 of them regularly.  The "babies", "teenagers", and males seem to have found another place to feed.
It may be harder for our neighbors, Bob and Jan, and us to enjoy our Thanksgiving dinner this year knowing that we'll be eating a relative of the turkeys.  Robbie's a vegetarian and normally ignores that Marie, Jeanne and I eat meat.  But he has been mentioning that we shouldn't eat turkey this year. 

So instead of stamping 'Happy Thanksgiving" on this particular card, I used a Northwoods Wooden stamp to stamp the message "Happy Turkey Day".  The turkey's feathers are a maple leaf that I punched from an EK Success paper punch.  The Mandarin, Cappucino and Lemondrop twine from The Twinery adds texture to the card.  I keep seeing more and more wiggly eyes on cards and decided to add them to my turkey.  The turkey's body is a stamp from PaperTrey Ink.  I stamped him once on a sheet of patterned paper and once on a sheet of white tag.  I fussy cut just the body of the tag image and used foam tape to adhere it on top of the other turkey.
This gave the turkey some dimension and it also meant I didn't have to cut out the legs. 


I started teaching my paper crafting classes this week and I have 3 teacher trainings to present next week.  So I have some prep to do. 

Have a great day!
Carol

Thursday, September 15, 2011

Elephant Cupcakes and Cards

Hi Everyone!

It's after 11 PM and this is my second post of the day.  I must write it while today's events are fresh in my mind.  Meet Marie and Beth...

Marie is my daughter and she's the one who is standing.  Beth is a friend of Marie's. 

This morning Marie decided that she was going to make her friend Allison some elephant cupcakes for her birthday because Allison loves elephants.  So Marie looked through our cupcake cookbooks and found exactly what she wanted in our copy of Hello Cupcake.  She thought they looked a little complicated so she asked Beth to come over to bake with her.

Well, the girls worked together and  were thrilled with their creations.


Aren't they adorable!  Allison will be thrilled.

Beth needs to get up early to head to work so she went home when the cupcakes were done.  Marie decided that she wanted to make Allison an elephant card.  I pulled out a Martha Stewart elephant punch, a Denami Design elephant stamp, a Sizzix baby elephant die, and an AccuCut Zip'e Slim elephant die. 

Marie wanted to make an elephant shaped card so I showed her how to place the paper on the die so that it would cut the shape that she wanted.  I suggested that she cut another elephant and then fussy cut the ear so that she could add it to the card with some foam tape.

Well, I thought the card looked cute just the way it was, but Marie wanted to put some roller blades on it...and then a helmet...and some wiggly eyes with eyelashes...and a cupcake and a party blower!  Here's her card!


The roller blade wheels are tiny pony beads.  The cupcake and party blower are stickers.  Too cute!

I made Allison a card too.


Hey, at least it has an elephant on it!

Guess it's time for bed.  Will be back tomorrow!

Carol


Leaf Wreath

Hi Everyone!

I’ve been working on some Fall and Thanksgiving crafts and cards. Last night I created this Fall wreath.


I used some Sizzix and AccuCut Zip’e Slim dies and an EK Success maple leaf punch to cut leaves from patterned papers in a variety of sizes and styles. Then I used a hot glue gun to glue them to a flat wooden wreath form from the Maine Wreath Company. I love those wreath forms because even a fully decorated wreath fits comfortably between my front and storm doors.

I'll be back tomorrow with some Fall and Thanksgiving cards.

Have a great night!
Carol


I used some Sizzix and AccuCut Zip’e Slim dies and an EK Success maple leaf punch to cut leaves from patterned papers in a variety of sizes and styles. Then I used a hot glue gun to glue them to a flat wooden wreath form from the Maine Wreath Company. I love these wreath forms because even a fully decorated wreath fits comfortably between my front and storm doors.

Wednesday, September 14, 2011

Lawn Fawn's "On the Mend"

Hi Everyone!


I decided to play with Lawn Fawn's "On the Mend" clear stamp set to create some get well cards and packets.  I think the images in this set are adorable and I totally LOVE the font that is used for the text.

I created a get well packet that includes a sleeve for a purse size package of tissues, a pocket for a package of Cup of Soup mix, and a mini get well card.


For this set I deliberately chose a patterned paper that would work for anyone. 


After I stamped and fussy cut the tissue box I used a craft knife to cut a slit where the tissues come out of the box and slid a scrap of yellow vellum into the slit to create a "tissue".   The tissue box is adhered to the sleeve with foam tape. 


I used a Martha Stewart border punch to create the decorative edge on the soup packet holder.  I cut a tiny slit in the soup bowl so that I could slide the tip of the spoon into it.  The bowl and spoon are adhered to the card with foam tape.  The brads are holding the pocket closed so that I could slide in a packet of soup mix.


I used a standard circle Nestability die to punch through the layers on this mini card.  The ladybug is a Favorite
Findings button.  There is a "bug" in the clear stamp set, but for this card I chose to use a button.


Be sure to check out the "On the Mend" clear stamp set on the Lawn Fawn web site so that you can see the other stamps that are included in that set.


Enjoy this beautiful day!
Carol

Tuesday, September 13, 2011

Apples for Teachers

Hi Everyone!

I decided to create some thank you cards for teachers and chose apples as a theme for them. I looked through my supplies and found a Martha Stewart apple punch, an AccuCut apple die, a Hero Arts set of 4 wooden apple stamps and a Hero Arts clear apple stamp in their "Simply Fresh" clear stamp set, apple ribbon, apple brads, and some apples patterned paper.


I used the clear apple stamp from Hero Art's "Simply Fresh" clear stamp and stamped 3 apples on some white tag.  I colored the apples with water color pencils and fussy cut them before I adhered them to the layering paper. 


This apple was cut with an AccuCut Zip'e Slim apple die.  There's a hole in the die so that a picture can be added to the middle of the die cut.  I adhered the apple die cut with foam tape to add dimension to the card and stamped "thank you" in the center.  I added apple ribbon to the layering paper before I adhered it to the blank card.


These apples were cut with a Martha Stewart apple punch and are attached to the layering paper with foam tape.  The strip of apples across the bottom of the card was created with some paper from dcwv's Grade School paper pad.


The apple on this card was stamped with an apple from a Hero Arts set of 4 apples and is adhered to the card with foam tape. 


The apples on this card are brads from Eyelet Outlet.  I used circle Nestabilities to create the circles that the apples are mounted on. 


Here's another card with an apple brad.  I used a standard circle and a scalloped circle Nestability for the background for the brad.


This card was created with apple paper from dcwv's Grade School
paper pad and stamped with a Hero Arts apple stamp.


That's it for today!  I think I'll make a waldorf salad for supper!

Have a great night!
Carol

Sunday, September 11, 2011

Denami Design's Tasty Treats Blog Hop

Hi Everyone!

Today is Denami Design’s Tasty Treats Blog Hop. Here are the details from Denami Design about this blog hop.


When: The blog hop starts on September 11 at 6 AM, PST. However, you have until September 12, 2011, 11:59 pm PST, to leave comments on all the blogs (to be eligible for a prize).Why: To be inspired by cards featuring DeNami Design "sweet" stamps and also the chance to win mini shopping sprees on the DeNami Design website!Prizes: We are giving away THREE $20 gift certificates to our website! We'll be giving away one gift certificate to a random participant (DT members not eligible) and then we'll also be giving away TWO gift certificates to TWO people who comment along the hop!


If you started at the beginning of the hop you have arrived from Dana Seymour's blog at http://kismetartlife.blogspot.com  
If you get lost along the way you can always start at the beginning of the blog at http://denami.blogspot.com
You are currently at Carol Hartery’s blog at www.carolhartery.blogspot.com

Tasty Treats make me think of the chefs and bakers who create tasty treats for us to eat. In my family we are very fortunate that Rob, Marie and I all enjoy cooking. Rob especially likes to bake pies. Marie prefers cooking to baking and I enjoy cooking and baking. Soups, salads, quick breads, and fruit crisps are among my favorites to prepare.

I decided that Denami Design's Chef Chickie was perfect for this hop. I used a Sizzix die to cut out my apron, stamped the Chef Chickie on a square of white tag and faux stitched the square onto the apron to make it look like a pocket.

I used a Mitten Shapeability to create an oven mitt for the card and stamped Denami Design’s "Hey chickie" on it. I typed "What’s cookin’?" and printed it on a piece of manilla tag. I cut the tag and created a rolling pin. The wooden spoon is a sticker. I added some Glossy Accents to it.

Remember to leave a comment on this blog before you move along to Tenia Nelson's blog at http://jazzypaper.blogspot.com/

I hope you’ll also become a follower of my blog. I’ve been working on all sorts of paper crafts for Halloween and Christmas that I will be sharing in the next few weeks.

Have a great Sunday!
Carol

Saturday, September 10, 2011

Bookmarks

Hi Everyone!

I went a little overboard when I purchased tassels for the graduation cards I was making a few months ago.  I'd forgotten about them until I was doing some cleaning yesterday.  I decided to use them on some bookmarks. 


The sun and cloud on this bookmark were cut with dies.  The text is from
Lawn Fawn's "Partly Cloudy" clear stamp set.  I've gotten better at using my Crop A dile to add eyelets to my creations.  I learned that I was squeezing too hard and that's why they were cracking. 


The flowers on this bookmark were stamped with a Hero Arts "Sally's Bouquet" wooden stamp. 
The text is from Lawn Fawn's "Hello Friend" clear stamp set. 


I looked through my K & Company borders and thought these would be great on bookmarks.  "Life's a beach" was created with A Country Welcome wooden stamp.  "Enjoy the Sweet Things in Life" was created with an Impression Obsession wooden stamp. 


A birthday bookmark could be given to a friend inside a birthday card or in place of one.  The images on these bookmarks were created with stamps from the Hero Arts "Wonderful Birthday" clear stamp set.  I stamped the images on patterned paper and then fussy cut them before I glued them to the bookmarks.


Hope these bookmarks triggered some ideas for you.

Have a great night!
Carol

Thursday, September 8, 2011

Happy Birthday Pam and Paula

Hi Everyone!

Just dropping by to say hello to all of you and Happy Birthday to my twin sisters, Paula and Pam.  Paula and Pam are celebrating their 48th birthday today some where in British Columbia.  Pam recently told me that they have celebrated all but two of their birthdays together.  Pam and Paula both live on the west coast so I rarely see either of them, but they are always in my thoughts. 

I have been working on paper crafts as often as I can lately.  The first craft fair that I have registered for is about 5 weeks away, but another will be 2 weeks after the first one and a third will be one week after the second one.  I will share a few of the things I have created for the fairs with you sometime soon.  Meanwhile, I have another birthday card to share with you

I ran the layering paper for this card through a Cuttlebug birthday embossing folder.  Then I sanded the paper to expose some of its white core so that the words would pop out at us.
The cupcake, gift and candle images are from Momenta's "Birthday Wishes" 12" x 12" paper pad.  The cupcake and gift were on papers that had familiar birthday objects on circles that were all over the papers.  I paper punched the circles and adhered them to my card.  Then I fussy cut a cupcake and a gift and used foam tape to layer them on the matching images that were on the circles.  I used a paper punch to punch out some candles from another piece of paper. 

That's it for today!
Carol