Search This Blog

Showing posts with label Sassafras. Show all posts

Saturday, January 29, 2011

In My Own Little Corner

Good Morning Everyone!

Do you remember the song "In My Own Little Corner" from Roger and Hammerstein's Cinderella? I often think of that song and of the scene that song was sung in when I sit here working "in my own little corner". I spend more time in the corner of my dining room than I do in any other room in our home. It's in this corner that I plan and prep my early childhood teacher trainings, my afterschool classes for children, and my adult education classes. I sit here when I am planning meals and creating shopping lists. It's in this corner that I dream of and create all of my paper crafts.


As I sit here typing this post my valentine wooden stamps are displayed on the wall directly above me. Rolls of red, pink, and white ribbons are strung on the paper towel rack below my stamp shelves. My heart paper punches are to the right of me along with my valentine and other embossing folders, my clear valentine stamps, and my heart Nestabilities.

I often fidget with the heart shaped buttons that are sitting here next to me in a small red heart shaped bowl. I have a plastic drawer that is filled with valentine papers and some smaller drawers that hold my valentine stickers, brads, and embellishments.

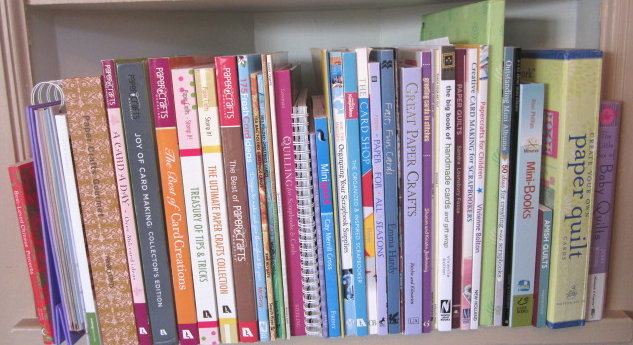
My collection of papercrafting books and magazines are housed on some nearby shelves.


With all of this inspiration within an arm's reach it's easy to come up with ideas for the cards, tags, bags, and boxes that I love to create. As I have said before I am most definitely addicted to paper crafting.


When I glanced up at my shelves last night my "Love Goes Round" stamp from Stampendous caught my eye. I found some musical notes paper in my Sassafras Nerdy Bird Wee bundle and decided it was just what I needed for the card I had sketched. Had some ribbon with tiny hearts on it and musical notes brads in my stash so I grabbed them. I used a few of my Marvy Uchida heart punches to punch some plain and scalloped hearts. After I assembled them I ran them through a Cuttlebug embossing folder. I used red tag for the "lace" on my hearts because I thought it would draw out the red on the musical notes. As I sit here looking at the card right now I am thinking I may have liked white "lace" better so I'll try it that way on a similar card.


While I was pulling out some tiny hearts for my first card I came across a strip of plastic with red puffy letters on it that said "Love" and decided to use them for my second card. Once again I used my heart punches to punch out a plain and a scalloped heart. Paper pierced the white heart to make it look lacy. Stamped a branch from PaperTrey Ink's "Take a Bough" clear stamp set across the hearts to give the "love birds" from A Muse Artstamps a place to sit. Last night I chose to use different colors and sizes of epoxy hearts for the leaves on the branch. Today I am thinking just red ones would look better. I am most definitely my own worst critic.


This chipboard elephant was in my stash.  Wish I could remember where it came from.  MaryBeth, do you know?  Either you gave it to me or I bought it in some set when I was with you. The hearts on the elephant, the ones coming out his trunk, and the ones on the little bird all cried out "valentine" to me. Embossed the layering paper and punched a hole in it after I had adhered it to a blank card. Used a Marvy metal ring to highlight the "Be Mine" text and attached it in the middle of the hole I had punched.  When the card is opened you can still see the text. 

Two very dear friends are coming for dinner tonight so I need to leave my little corner of the world to do some grocery shopping.


Enjoy your day!
Carol

Wednesday, August 4, 2010

Hello!

Hi Everyone!

I am VERY VERY excited about the cards I am going to share with you today. I’ve told you that I keep my clear stamps in cd cases. I cut the packaging that has the black outlines of each stamp and use my Scor-Pal tape to attach it to the empty case. Then I match the stamps to the black outlines, but there are exceptions. I store all of my "happy birthday" clear stamps in one case and all of my "thank you" clear stamps in another case. As of today I now store all of my "hello" stamps together along with Lawn Fawn’s telephone clear stamp.


The telephone is from Lawn Fawn’s "Just My Type" clear stamp set. "Just saying hello" is from the Hero Art’s Everyday Sayings stamp set that I have been talking about for the past couple of days. One of the "hello" stamps is from Lawn Fawn’s "Just My Type" clear stamp set and the rest of the "hello" stamps are from all different sets of clear and wooden stamps in my stash.

After I had stamped and colored the telephone I very carefully cut the receiver off of the phone. I used my paper piercer to make a tiny hole in the phone and in the receiver. I wrapped thin jewelry wire around a toothpick to curl it like a real phone cord and then I put one end of the wire in the hole I had made in the receiver and the other end in the hole I had made in the phone.

The yellow memo paper is from the Sassafras Nerdy Bird Wee Bundle. Fun! Fun! Fun!

Yesterday I had lunch with an "old" friend. Well, she’s not really that old...she’s 3 years younger than I am. I packed us a picnic lunch. As I drove to her home I realized I had forgotten to pack salad dressing so I stopped at Stop & Shop to pick some up. While I was there I decided to quickly browse through the magazine section because you never know what kind of inspiration might be lurking on the shelves. I glanced at the magazines on the shelves and the August/September 2010 issue of
Quilt magazine jumped out at me. I looked at the quilt on the cover and the first word that came into my mind was "Nestabilities". I knew I could use that quilt as a trigger to create a quilted card.


Here it is! After I created the quilt I decided to use my Cuttlebug and run the quilt through an embossing folder. Wrong...it was too thick. I peeled the top three circles off of each stack. Then I was able to emboss the rest of the card and embossed the 6 stacks of 3 circles each separately. Then I reattached those circles to the card.
I still have a stack of cards that I made last weekend to share with you. Hopefully, I will have a chance to post them tomorrow.

Have a great night!
Carol