Happy Valentine's Day!
I am sure that you are familiar with the expression "the apple doesn't fall from the tree". I can share this picture with you because I know that Marie doesn't follow my blog. She was in her room creating valentine mailboxes for the residents at the nursing home where she works when I snapped this photograph of her. She made mailboxes for days. She scooped up every juice carton and tissue box that Gayle saved for me along with all of the ones I have been saving too.
Those of you who don't know me personally are probably wondering why on earth I would save such things. I am an early childhood educator who trains other early childhood teachers. I create games and other learning tools out of recycled materials and share those ideas with teachers in my trainings.
Robbie and Marie have grown up watching me create dragons out of egg cartons and mailboxes from milk cartons and now Marie does many of those activities for and with the nursing home residents. I had to share the photograph because I know that those of you who know Marie are laughing right now. Yes, after all those years of head-butting, Marie and I have become more and more alike. She crafts. She cooks. She bakes and she drinks tea!
Here's the valentine I made for Robbie. Some of you know from previous posts that Robbie and I share some "owl" memories so more often than not I make him an owl card. He bought me a set of "Wise Owls" clear stamps from PaperTrey Ink for Mother's Day last year and loves when I use them. Of all the people in my world Rob pays the most attention to my cards and critiques them for me.
The branch on the card is from PaperTrey Ink's "Take a Bough" set. I use that branch over and over again on all sorts of cards. I love the font that was used on the "Owl always love you" stamp from Stampendous. It embossed beautifully. The letters are nicely raised on the card.
Last week I created several "Get well" cards and I was disappointed when I realized I had sent them off before I photographed them. Happily I still have this one to share with you. The paper is from a 6" x 6" Adhesive Paper Prints stack from dcwv. The bed and pill bottles were created with clear stamps from the "Take It EZ" clear stamp set from Woodware USA. "Get Well Soon" was stamped with a stamp from Impression Obsession. For some reason each time I look at this card I think of Beatrix Potter. The colors must be similar to colors she used in one of her books or maybe the bed looks like a bed from one of her books.
I love the idea for this card, but I don't love the vase I free cut for it. I'll probably end up pulling it off and making a slightly smaller one. Layering papers are from American Crafts. Text was stamped with a Northwoods wooden rubber stamp.
I have some baking to do right now and a workshop later so it's time for me to sign off for today.
Have a great day!
Carol
Search This Blog
Showing posts with label Stampendous. Show all posts
Monday, February 14, 2011
Saturday, January 29, 2011
In My Own Little Corner
Good Morning Everyone!
As I sit here typing this post my valentine wooden stamps are displayed on the wall directly above me. Rolls of red, pink, and white ribbons are strung on the paper towel rack below my stamp shelves. My heart paper punches are to the right of me along with my valentine and other embossing folders, my clear valentine stamps, and my heart Nestabilities.
I often fidget with the heart shaped buttons that are sitting here next to me in a small red heart shaped bowl. I have a plastic drawer that is filled with valentine papers and some smaller drawers that hold my valentine stickers, brads, and embellishments.
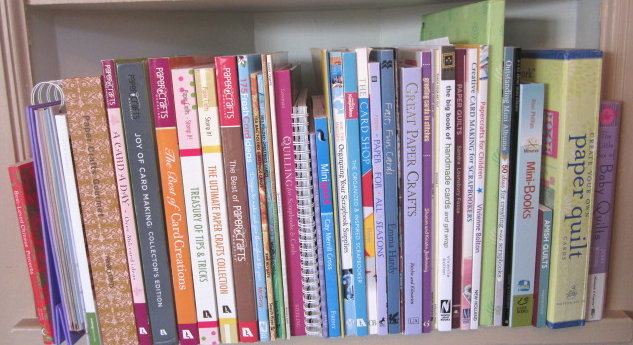
My collection of papercrafting books and magazines are housed on some nearby shelves.
With all of this inspiration within an arm's reach it's easy to come up with ideas for the cards, tags, bags, and boxes that I love to create. As I have said before I am most definitely addicted to paper crafting.
While I was pulling out some tiny hearts for my first card I came across a strip of plastic with red puffy letters on it that said "Love" and decided to use them for my second card. Once again I used my heart punches to punch out a plain and a scalloped heart. Paper pierced the white heart to make it look lacy. Stamped a branch from PaperTrey Ink's "Take a Bough" clear stamp set across the hearts to give the "love birds" from A Muse Artstamps a place to sit. Last night I chose to use different colors and sizes of epoxy hearts for the leaves on the branch. Today I am thinking just red ones would look better. I am most definitely my own worst critic.
This chipboard elephant was in my stash. Wish I could remember where it came from. MaryBeth, do you know? Either you gave it to me or I bought it in some set when I was with you. The hearts on the elephant, the ones coming out his trunk, and the ones on the little bird all cried out "valentine" to me. Embossed the layering paper and punched a hole in it after I had adhered it to a blank card. Used a Marvy metal ring to highlight the "Be Mine" text and attached it in the middle of the hole I had punched. When the card is opened you can still see the text.
Two very dear friends are coming for dinner tonight so I need to leave my little corner of the world to do some grocery shopping.
Enjoy your day!
Carol
Do you remember the song "In My Own Little Corner" from Roger and Hammerstein's Cinderella? I often think of that song and of the scene that song was sung in when I sit here working "in my own little corner". I spend more time in the corner of my dining room than I do in any other room in our home. It's in this corner that I plan and prep my early childhood teacher trainings, my afterschool classes for children, and my adult education classes. I sit here when I am planning meals and creating shopping lists. It's in this corner that I dream of and create all of my paper crafts.
As I sit here typing this post my valentine wooden stamps are displayed on the wall directly above me. Rolls of red, pink, and white ribbons are strung on the paper towel rack below my stamp shelves. My heart paper punches are to the right of me along with my valentine and other embossing folders, my clear valentine stamps, and my heart Nestabilities.
I often fidget with the heart shaped buttons that are sitting here next to me in a small red heart shaped bowl. I have a plastic drawer that is filled with valentine papers and some smaller drawers that hold my valentine stickers, brads, and embellishments.
My collection of papercrafting books and magazines are housed on some nearby shelves.
With all of this inspiration within an arm's reach it's easy to come up with ideas for the cards, tags, bags, and boxes that I love to create. As I have said before I am most definitely addicted to paper crafting.
When I glanced up at my shelves last night my "Love Goes Round" stamp from Stampendous caught my eye. I found some musical notes paper in my Sassafras Nerdy Bird Wee bundle and decided it was just what I needed for the card I had sketched. Had some ribbon with tiny hearts on it and musical notes brads in my stash so I grabbed them. I used a few of my Marvy Uchida heart punches to punch some plain and scalloped hearts. After I assembled them I ran them through a Cuttlebug embossing folder. I used red tag for the "lace" on my hearts because I thought it would draw out the red on the musical notes. As I sit here looking at the card right now I am thinking I may have liked white "lace" better so I'll try it that way on a similar card.
While I was pulling out some tiny hearts for my first card I came across a strip of plastic with red puffy letters on it that said "Love" and decided to use them for my second card. Once again I used my heart punches to punch out a plain and a scalloped heart. Paper pierced the white heart to make it look lacy. Stamped a branch from PaperTrey Ink's "Take a Bough" clear stamp set across the hearts to give the "love birds" from A Muse Artstamps a place to sit. Last night I chose to use different colors and sizes of epoxy hearts for the leaves on the branch. Today I am thinking just red ones would look better. I am most definitely my own worst critic.
This chipboard elephant was in my stash. Wish I could remember where it came from. MaryBeth, do you know? Either you gave it to me or I bought it in some set when I was with you. The hearts on the elephant, the ones coming out his trunk, and the ones on the little bird all cried out "valentine" to me. Embossed the layering paper and punched a hole in it after I had adhered it to a blank card. Used a Marvy metal ring to highlight the "Be Mine" text and attached it in the middle of the hole I had punched. When the card is opened you can still see the text.
Two very dear friends are coming for dinner tonight so I need to leave my little corner of the world to do some grocery shopping.
Enjoy your day!
Carol
Sunday, January 23, 2011
Robot Valentines
Hi Everyone!

This is one of the valentine stamps that I added to my collection this year. It's called "Robot Friends" and it's manufactured by Stampendous. I just used it to create some very quick and easy valentines.
After I stamped the image onto white tag I used my Marvy Twinklette markers to color it. You can't tell by the photograph, but because I used those markers to color the entire image it's very sparkly. I found some Lil' Robot chipboard embellishments from My Mind's Eye in my stash and added them to the card.
The robot, gears, and word balloon on this card are also chipboard embellishments from My Mind's Eye. This time I masked my stamp and only stamped the text. I cut the text out and glued it to the word balloon.
Visiting with my friend Susan today and then I must continue to prep my workshops.
Have a great day! Stay warm!
Carol

This is one of the valentine stamps that I added to my collection this year. It's called "Robot Friends" and it's manufactured by Stampendous. I just used it to create some very quick and easy valentines.
After I stamped the image onto white tag I used my Marvy Twinklette markers to color it. You can't tell by the photograph, but because I used those markers to color the entire image it's very sparkly. I found some Lil' Robot chipboard embellishments from My Mind's Eye in my stash and added them to the card.
The robot, gears, and word balloon on this card are also chipboard embellishments from My Mind's Eye. This time I masked my stamp and only stamped the text. I cut the text out and glued it to the word balloon.
Visiting with my friend Susan today and then I must continue to prep my workshops.
Have a great day! Stay warm!
Carol
Saturday, January 15, 2011
Saturday's Valentines
Good Morning Everyone!
Not exactly sure why I got up at 7 AM on a Saturday! I've had my tea, read my e-mails, and now I am ready to start my day.
Today's first valentine was created with some Stampendous stamps. The window and the "stamp" that the text is stamped on were created with Sizzix dies. I used a Martha Stewart edger punch to create the lacy heart border for the valence on the windows.
I love all things punny so when I saw the idea for this card in an old issue of Scrapbooks, ETC. I knew I wanted to add it to my collection. Found an A Muse whale stamp on their web site that I HAD to own. Used an EK Success punch to create the strips of waves. Paper pierced the cloud to make it look as if it were stitched onto the card.
Came across the blue letters on this card while I was once again organizing my alphabet drawer. Even in the photograph the embossed hearts on the yellow tag pop out at me. They were created with a Cuttlebug hearts embossing folder that my friend Peggy bought me last year. Thanks, Peggy. If you study my valentines you'll see I've been using it a lot this year.
Here it is being used again on this "Bee Mine" card. The bee is from a box of Debbie Mumm chipboard embellishments. If you purchased a box of baby embellishments you have some of those bees.
Have a great day!
Carol
Not exactly sure why I got up at 7 AM on a Saturday! I've had my tea, read my e-mails, and now I am ready to start my day.
Today's first valentine was created with some Stampendous stamps. The window and the "stamp" that the text is stamped on were created with Sizzix dies. I used a Martha Stewart edger punch to create the lacy heart border for the valence on the windows.
I love all things punny so when I saw the idea for this card in an old issue of Scrapbooks, ETC. I knew I wanted to add it to my collection. Found an A Muse whale stamp on their web site that I HAD to own. Used an EK Success punch to create the strips of waves. Paper pierced the cloud to make it look as if it were stitched onto the card.
Came across the blue letters on this card while I was once again organizing my alphabet drawer. Even in the photograph the embossed hearts on the yellow tag pop out at me. They were created with a Cuttlebug hearts embossing folder that my friend Peggy bought me last year. Thanks, Peggy. If you study my valentines you'll see I've been using it a lot this year.
Here it is being used again on this "Bee Mine" card. The bee is from a box of Debbie Mumm chipboard embellishments. If you purchased a box of baby embellishments you have some of those bees.
Have a great day!
Carol
Sunday, June 20, 2010
Flower Chat
Hi Everyone!
I spent this humid day surrounded by 3 fans! I sat at my worktable and prepped 4 workshops, created games for a summer program for preschoolers, and made some cards. I decided to use a set of clear stamps from Stampendous called "Flower Chat" on today’s cards.
When you look at the picture of "Flower Chat" you will notice that instead of phrases many of the words are individual words that have an outline around them. There are additional phrases and single words in a variety of fonts and a bunch of flowers in a "window box".
Since the words are individual words you can arrange them any way that you want on a clear block before you stamp them. The "window box" has a space in it for a word to be stamped.
On this first card I stamped everything onto a white background paper and then used my Marvy Twinklette markers to color the stamped images. I put a tiny brad through the middle of each flower before I adhered the white background paper to a layer of green paper and then attached those papers to a blank card.

The words are just stamped on the white paper for this card. Instead of using the "window box" stamp, I used silk flowers and brads for the floral arrangement. I added a butterfly to the arrangement after I studied the photograph I had taken of the card.

I spent this humid day surrounded by 3 fans! I sat at my worktable and prepped 4 workshops, created games for a summer program for preschoolers, and made some cards. I decided to use a set of clear stamps from Stampendous called "Flower Chat" on today’s cards.
When you look at the picture of "Flower Chat" you will notice that instead of phrases many of the words are individual words that have an outline around them. There are additional phrases and single words in a variety of fonts and a bunch of flowers in a "window box". Since the words are individual words you can arrange them any way that you want on a clear block before you stamp them. The "window box" has a space in it for a word to be stamped.
On this first card I stamped everything onto a white background paper and then used my Marvy Twinklette markers to color the stamped images. I put a tiny brad through the middle of each flower before I adhered the white background paper to a layer of green paper and then attached those papers to a blank card.On the second card I cut the words out before I attached them to the card. A thin layer of foam tape would make the words pop out a little more.

The words are just stamped on the white paper for this card. Instead of using the "window box" stamp, I used silk flowers and brads for the floral arrangement. I added a butterfly to the arrangement after I studied the photograph I had taken of the card.

This time I just used the "window box" stamp and stamped the word "hello" in the window box’s empty space. I placed different sizes of white pearls in the center of each flower.
This is my favorite card. Stamped the window box on white and adhered the white onto a layer of brown. I wrapped some sheer brown ribbon around the polka dotted paper, added brads to the ribbon and attached it to the blank card before I attached the paper with the floral arrangement.
Hope that at least one of these cards inspires you.
Stay cool!
Subscribe to:
Posts (Atom)