Hello Everyone!
I created today's card for the Denami Designs Color Challenge #6. For this challenge participants were asked to create a card that uses the colors navy, lime, and white and at least one Denami stamp.
I decided to use the small side-view sheep #C71, the mini grass #B87, and the small Happy Easter #F160 stamps on my card. I chose a blank navy blue card and lime green tag for my layering paper. I ran the lime tag through a Cuttlebug D'vine Swirls embossing folder and used a Martha Stewart edger punch to embellish one side of it. The embossed swirls make me think of the way sheep's wool is often illustrated in children's books. I added a strip of white tag behind the punched dots to draw more attention to them.
I stamped a sheep on each of four white 1.25" squares. Then I masked each sheep and stamped grass onto those same squares. I stamped 4 additional sheep, ran them through a Cuttlebug Small Dots embossing folder, and fussy cut them before I used foam tape to layer them on top of the other sheep. I mounted each white square onto a 1.5" navy square and ran those squares through the Cuttlebug D'vine Swirls embossing folder.
I stamped "Happy Easter" onto a scrap of white tag and mounted it onto a piece of navy tag. I added some tiny lime green brads to either side of the text.
I decided the card needed some bling so I added some navy and lime dimensional stickers to it.
The card "feels" like Easter to me. The colors make me think of the patent leather shoes, straw hats and white gloves I wore on Easter many years ago.
Have a great day!
Carol
Search This Blog
Showing posts with label Cuttlebug. Show all posts
Saturday, February 26, 2011
Thursday, February 24, 2011
St. Patrick's Day cards
Good Morning!
Recently a few friends asked me to create some St. Patrick's Day cards. When I looked through my collection I discovered that I didn't have even one St. Patrick's Day stamp. Not a shamrock, a pot of gold, or even the words, "Happy St. Patrick's Day"! Although I have placed multiple stamp orders in the past month or so I never even thought of that holiday.
I drove to one of my favorite specialty stores and didn't find any St. Patrick's Day stamps in stock. I asked the woman at the desk if I had overlooked them and was told that they hadn't gotten any yet. Okay, now what?
I purchased a set of Hero Arts "Celebrate Every Day" clear stamps and that gave me the text that I wanted. I drove home and sat staring at my "wall of stamps". Suddenly I had an idea. I grabbed a Martha Stewart heart paper punch and punched out 3 green hearts. I ran them through my Cuttlebug Dots embossing folder and scored them in the middle to give them a little texture. Added a scrap of paper for a stem and I had a shamrock! If I added a 4th heart I could have created a 4 leaf clover.
Then I took my new medium round bowl stamp from DeNami Design, stamped it once on green tag and once on black tag and by adding a few embellishments I had pots of gold.
I found some St. Patrick's Day paper in my "green" paper drawer and some ribbon I liked in my ribbon stash.
Without further ado...here's my first card. The "gold pieces" are rhinestones from my bling container.
Here's my second card. I ran the layering paper through a Cuttlebug Argyle embossing folder. The layering paper has a variety of St. Patrick's Day related words on it. If you tip the paper back and forth you can see and read the words. It's kind of magical. (You can click on the picture to enlarge it and then you might be able to make out some of the words.
The "rainbow" was created with some very cool flat rhinestones. The shamrock is a Favorite Findings button. The text was cut from a piece of patterned paper.
Having some friends over today and tomorrow to paper craft!
Have a great day!
Carol
Recently a few friends asked me to create some St. Patrick's Day cards. When I looked through my collection I discovered that I didn't have even one St. Patrick's Day stamp. Not a shamrock, a pot of gold, or even the words, "Happy St. Patrick's Day"! Although I have placed multiple stamp orders in the past month or so I never even thought of that holiday.
I drove to one of my favorite specialty stores and didn't find any St. Patrick's Day stamps in stock. I asked the woman at the desk if I had overlooked them and was told that they hadn't gotten any yet. Okay, now what?
I purchased a set of Hero Arts "Celebrate Every Day" clear stamps and that gave me the text that I wanted. I drove home and sat staring at my "wall of stamps". Suddenly I had an idea. I grabbed a Martha Stewart heart paper punch and punched out 3 green hearts. I ran them through my Cuttlebug Dots embossing folder and scored them in the middle to give them a little texture. Added a scrap of paper for a stem and I had a shamrock! If I added a 4th heart I could have created a 4 leaf clover.
Then I took my new medium round bowl stamp from DeNami Design, stamped it once on green tag and once on black tag and by adding a few embellishments I had pots of gold.
I found some St. Patrick's Day paper in my "green" paper drawer and some ribbon I liked in my ribbon stash.
Without further ado...here's my first card. The "gold pieces" are rhinestones from my bling container.
Here's my second card. I ran the layering paper through a Cuttlebug Argyle embossing folder. The layering paper has a variety of St. Patrick's Day related words on it. If you tip the paper back and forth you can see and read the words. It's kind of magical. (You can click on the picture to enlarge it and then you might be able to make out some of the words.
The "rainbow" was created with some very cool flat rhinestones. The shamrock is a Favorite Findings button. The text was cut from a piece of patterned paper.
Having some friends over today and tomorrow to paper craft!
Have a great day!
Carol
Labels:
Cuttlebug,
Denami Design,
Hero Arts,
Martha Stewart
Saturday, February 19, 2011
Hoppy the Bunny
Happy Saturday Everyone!
I am so excited to announce that I won the Impression Obsession drawing after I submitted a cupcake card into their It's a Cupcake Kind of Day challenge. I won a gift certificate to their online store and cannot wait to choose my new stamps. Be sure to start following their blog and pay attention to the challenges so that you can submit cards too. When you win you get to add a blinking widget to your blog.
I have been busy creating cards and paper crafts for St. Patrick's Day, Spring, Easter, and Mother's Day. There's still snow outside, but there's spring everywhere you look inside my house.
The blank card I used for this card is hot pink not red like the camera made it look. I stamped the Tree for All Seasons from Stamps by Judith onto the layering paper and then ran the paper through my newest Cuttlebug embossing folder. Then I punched out lots of baskets and eggs from a Martha Stewart Easter basket/eggs punch that I purchased last year after Easter. When you punch you get one basket and 4 eggs. I set most of the baskets aside to use on other cards, but I cut the handle off of one basket to create a stand for the tree. I punched out a chick from another Martha Stewart punch and put it "in the stand". After I studied the picture I added a tiny black rhinestone to the chick for an eye. I used mini glue dots to attach all of those tiny eggs to the tree. Suggestion...Put the eggs on the strip of mini dots and then pull them off of the paper one at a time as you put them on the card.
Hoppy the Bunny from A Muse Artstamps is doing the Bunny Hop with his friends. Hoppy is on sale on their web site for just $2.00! You don't want to miss out on a bargain like that one! I stamped Hoppy over and over again across the card and then used my watercolor pencils to color in each bunny. I'm not sure that you can see it in the picture, but I tapped a pink American Crafts glitter marker onto each bunny's nose. Used mini glue dots to attach each tiny pompom cottontail. The butterfly is from a Fiskars hand punch and the flowers are too. I used my Martha Stewart fringing scissors to cut the grass.
That's all I have time to share today, but I'll be back again soon with more ideas for you. Please remember that all bloggers love comments. Please send some to my blog instead of to my e-mail. Thank you in advance for taking the time to comment.
Have a great day!
Carol
I am so excited to announce that I won the Impression Obsession drawing after I submitted a cupcake card into their It's a Cupcake Kind of Day challenge. I won a gift certificate to their online store and cannot wait to choose my new stamps. Be sure to start following their blog and pay attention to the challenges so that you can submit cards too. When you win you get to add a blinking widget to your blog.
I have been busy creating cards and paper crafts for St. Patrick's Day, Spring, Easter, and Mother's Day. There's still snow outside, but there's spring everywhere you look inside my house.
The blank card I used for this card is hot pink not red like the camera made it look. I stamped the Tree for All Seasons from Stamps by Judith onto the layering paper and then ran the paper through my newest Cuttlebug embossing folder. Then I punched out lots of baskets and eggs from a Martha Stewart Easter basket/eggs punch that I purchased last year after Easter. When you punch you get one basket and 4 eggs. I set most of the baskets aside to use on other cards, but I cut the handle off of one basket to create a stand for the tree. I punched out a chick from another Martha Stewart punch and put it "in the stand". After I studied the picture I added a tiny black rhinestone to the chick for an eye. I used mini glue dots to attach all of those tiny eggs to the tree. Suggestion...Put the eggs on the strip of mini dots and then pull them off of the paper one at a time as you put them on the card.
Hoppy the Bunny from A Muse Artstamps is doing the Bunny Hop with his friends. Hoppy is on sale on their web site for just $2.00! You don't want to miss out on a bargain like that one! I stamped Hoppy over and over again across the card and then used my watercolor pencils to color in each bunny. I'm not sure that you can see it in the picture, but I tapped a pink American Crafts glitter marker onto each bunny's nose. Used mini glue dots to attach each tiny pompom cottontail. The butterfly is from a Fiskars hand punch and the flowers are too. I used my Martha Stewart fringing scissors to cut the grass.
That's all I have time to share today, but I'll be back again soon with more ideas for you. Please remember that all bloggers love comments. Please send some to my blog instead of to my e-mail. Thank you in advance for taking the time to comment.
Have a great day!
Carol
Wednesday, February 9, 2011
Birthday Lanterns
Good morning!
Valentine's Day is 5 days away, but I have decided it's time for me to move on from that "love"ly holiday. Although I haven't exhausted my ideas or materials for valentine cards and crafts, I've created all of the valentines I need for me to send and for others to purchase.
My house is still decorated for Valentine's Day and there are still valentine treats to bake, but I am in the process of transforming my "Own Little Corner" to get ready for Spring, Easter, and Mother's Day creations. I've rearranged my stamps so that the ones I have for those occasions are front and center. My ribbon organizer is mainly filled with pastel ribbons. Rotating materials makes me more aware of what I have and also makes me aware of what I "need". Note to self... I DON'T need any more Easter or spring themed paper punches.
I rotate my materials frequently, but I clean this corner CONSTANTLY! Why is dust so attracted to computer monitors? Add embossing powders, glitter, adhesives and tiny scraps of paper to the work area and there's even more of a need to clean.
Last night's class for the Lexington Community Education program was so much fun. I met the nicest people who created adorable wreaths and sweet cards. It's fun to share ideas and techniques and to see how others approach their projects.
I made this birthday card a few days ago. The lanterns were created with 2 wooden (from a set of 3) lantern stamps from Hero Arts. I used my Tuxedo Black Memento ink pad to stamp the images onto some scraps of pink, green, and yellow vellum. I colored the images with my Marvy Twinklette markers. I fussy cut the lanterns and punched a tiny hole in the top of each of them before I threaded some gold cord through them.
I ran a piece of white tag through a dotted Cuttlebug embossing folder before I attached it to a blank card. The lanterns are adhered to the layering paper with dimensional foam tape. I touched the tip of a few markers to some of the dots on the tag to make them look like confetti falling through the air. "Birthdays are the best" was stamped with a PaperTrey Ink clear stamp from their Blooming Buttons set. I deliberately "curled" the stamp a little before I attached it to a clear block.
Have a great day!
Carol
Valentine's Day is 5 days away, but I have decided it's time for me to move on from that "love"ly holiday. Although I haven't exhausted my ideas or materials for valentine cards and crafts, I've created all of the valentines I need for me to send and for others to purchase.
My house is still decorated for Valentine's Day and there are still valentine treats to bake, but I am in the process of transforming my "Own Little Corner" to get ready for Spring, Easter, and Mother's Day creations. I've rearranged my stamps so that the ones I have for those occasions are front and center. My ribbon organizer is mainly filled with pastel ribbons. Rotating materials makes me more aware of what I have and also makes me aware of what I "need". Note to self... I DON'T need any more Easter or spring themed paper punches.
I rotate my materials frequently, but I clean this corner CONSTANTLY! Why is dust so attracted to computer monitors? Add embossing powders, glitter, adhesives and tiny scraps of paper to the work area and there's even more of a need to clean.
Last night's class for the Lexington Community Education program was so much fun. I met the nicest people who created adorable wreaths and sweet cards. It's fun to share ideas and techniques and to see how others approach their projects.
I made this birthday card a few days ago. The lanterns were created with 2 wooden (from a set of 3) lantern stamps from Hero Arts. I used my Tuxedo Black Memento ink pad to stamp the images onto some scraps of pink, green, and yellow vellum. I colored the images with my Marvy Twinklette markers. I fussy cut the lanterns and punched a tiny hole in the top of each of them before I threaded some gold cord through them.
I ran a piece of white tag through a dotted Cuttlebug embossing folder before I attached it to a blank card. The lanterns are adhered to the layering paper with dimensional foam tape. I touched the tip of a few markers to some of the dots on the tag to make them look like confetti falling through the air. "Birthdays are the best" was stamped with a PaperTrey Ink clear stamp from their Blooming Buttons set. I deliberately "curled" the stamp a little before I attached it to a clear block.
Have a great day!
Carol
Labels:
Cuttlebug,
Hero Arts,
Marvy Twinklette,
Memento,
PaperTrey Ink
Thursday, February 3, 2011
Paper Pieced Birthday Cards
Hi Everyone!
I spent the day cooking, baking, and creating cards. I was in the mood to do some paper piecing and decided to make some birthday cards.
Paper piecing is easy and fun to do. You just need a pair of small sharp scissors and some patterns. You can find a variety of free paper piecing patterns on the Scrapbooks, ETC. web site. The patterns for the cake and cupcake are from "Birthday Paper-Piecing Patterns" in the Events section and the dog pattern is from "Animals Paper-Piecing Patterns" in the Animals & Nature section.
The patterned papers I used on today's three cards are from the American Crafts awesome "Abode" collection. I ran the white tag on this card through a Cuttlebug Spots & Dots embossing folder and then used a Martha Stewart Scallop Dot edger punch to embellish one side of it. "Make a Wish" was stamped with A Country Welcome wooden stamp. Before I adhered the assembled cake to the layering paper I put dimensional tape on it so that it would "pop" off the card.
The "Happy Birthday" text on this card was created with a Heartfelt Creations wooden stamp. I ran the "muffin wrapper" through one of my paper crimpers before I assembled the cupcake.
I used Martha Stewart's Zig Zag edger punch to embellish the white tag on this card. "Have a doggone great day!" was stamped with an Inky Antics stamp. I adhered dimensional tape behind the message and the dog's face. The dog's eyes are created with small black brads and the heart nose was punched from a small heart punch. The tag on the dog's collar is a brad.
Have a great night!
Carol
I spent the day cooking, baking, and creating cards. I was in the mood to do some paper piecing and decided to make some birthday cards.
Paper piecing is easy and fun to do. You just need a pair of small sharp scissors and some patterns. You can find a variety of free paper piecing patterns on the Scrapbooks, ETC. web site. The patterns for the cake and cupcake are from "Birthday Paper-Piecing Patterns" in the Events section and the dog pattern is from "Animals Paper-Piecing Patterns" in the Animals & Nature section.
The patterned papers I used on today's three cards are from the American Crafts awesome "Abode" collection. I ran the white tag on this card through a Cuttlebug Spots & Dots embossing folder and then used a Martha Stewart Scallop Dot edger punch to embellish one side of it. "Make a Wish" was stamped with A Country Welcome wooden stamp. Before I adhered the assembled cake to the layering paper I put dimensional tape on it so that it would "pop" off the card.
The "Happy Birthday" text on this card was created with a Heartfelt Creations wooden stamp. I ran the "muffin wrapper" through one of my paper crimpers before I assembled the cupcake.
I used Martha Stewart's Zig Zag edger punch to embellish the white tag on this card. "Have a doggone great day!" was stamped with an Inky Antics stamp. I adhered dimensional tape behind the message and the dog's face. The dog's eyes are created with small black brads and the heart nose was punched from a small heart punch. The tag on the dog's collar is a brad.
Have a great night!
Carol
Monday, January 31, 2011
Chickie with Heart Balloon
Good Morning Everyone!
I see a bright blue sky through my dining room window. Lots of squirrels running around out there right now. They must be stocking up on food before the next storm arrives.
Covered the chickie's heart balloon with an epoxy heart sticker to make her umbrella. LOVE the cloud dies I used from PaperTrey Ink. I paper pierced them before I adhered the layering paper to the blank card.
You've seen me use the sketch for this card over and over again. The chickies are on 1.25" squares and are mounted on 1.5" squares. The dotted embossing definitely adds some fun texture to the card. Button is from my stash. I think it's a Favorite Findings, but I am not positive.
Robbie laughed when he saw this card and commented "That's a lot of blank space!" but that's what I like about the card. I used a Cuttlebug Hearts embossing folder to emboss the layering paper. Covered the chickie's heart with an epoxy sticker.
I was imagining a flock of chicks floating through the air when I created this card. Used my PaperTrey Ink cloud dies again and paper pierced them again. Created the text on my computer.
I have a little rainbow thing going on here as the chicks line up. Stamped a chick about every .75" Red heart jewels on red heart layering paper. They work. The jewels catch the light.
I thought about not posting this card. At least not yet because I know it needs something else, but I haven't figured out what that something is. After I studied the photograph of it I anchored the corners down better as I hate an untidy looking card. The layering paper is embossed. I'm afraid to stamp a text at this point because I'm not sure how cleanly I could stamp on the embossing.
Off for a day of errands with Marie. Have a good one!
Carol
I see a bright blue sky through my dining room window. Lots of squirrels running around out there right now. They must be stocking up on food before the next storm arrives.
Yesterday I played around with mainly one stamp called "Chickie with Heart Balloon" from Denami Design. The "Happy Valentine's Day" text is an A Muse Artstamp and the red heart on the first card is from Rubber Soul. All 3 stamps are on the tiny side, but all of them still give a clean impression when I stamp them which I believe is a testament to their quality.
Covered the chickie's heart balloon with an epoxy heart sticker to make her umbrella. LOVE the cloud dies I used from PaperTrey Ink. I paper pierced them before I adhered the layering paper to the blank card.
You've seen me use the sketch for this card over and over again. The chickies are on 1.25" squares and are mounted on 1.5" squares. The dotted embossing definitely adds some fun texture to the card. Button is from my stash. I think it's a Favorite Findings, but I am not positive.
Robbie laughed when he saw this card and commented "That's a lot of blank space!" but that's what I like about the card. I used a Cuttlebug Hearts embossing folder to emboss the layering paper. Covered the chickie's heart with an epoxy sticker.
I was imagining a flock of chicks floating through the air when I created this card. Used my PaperTrey Ink cloud dies again and paper pierced them again. Created the text on my computer.
I have a little rainbow thing going on here as the chicks line up. Stamped a chick about every .75" Red heart jewels on red heart layering paper. They work. The jewels catch the light.
I thought about not posting this card. At least not yet because I know it needs something else, but I haven't figured out what that something is. After I studied the photograph of it I anchored the corners down better as I hate an untidy looking card. The layering paper is embossed. I'm afraid to stamp a text at this point because I'm not sure how cleanly I could stamp on the embossing.
Off for a day of errands with Marie. Have a good one!
Carol
Labels:
A Muse Artstamps,
Cuttlebug,
Denami Design,
PaperTrey Ink,
Rubber Soul
Saturday, January 29, 2011
In My Own Little Corner
Good Morning Everyone!
As I sit here typing this post my valentine wooden stamps are displayed on the wall directly above me. Rolls of red, pink, and white ribbons are strung on the paper towel rack below my stamp shelves. My heart paper punches are to the right of me along with my valentine and other embossing folders, my clear valentine stamps, and my heart Nestabilities.
I often fidget with the heart shaped buttons that are sitting here next to me in a small red heart shaped bowl. I have a plastic drawer that is filled with valentine papers and some smaller drawers that hold my valentine stickers, brads, and embellishments.
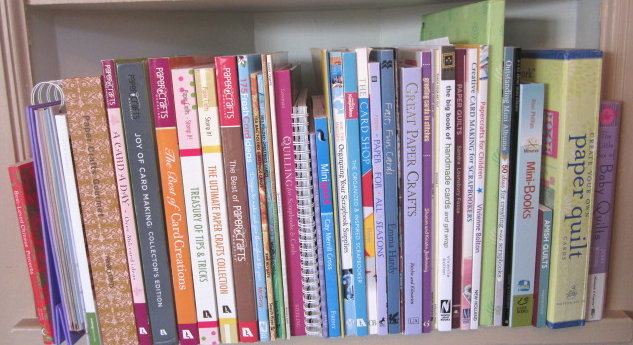
My collection of papercrafting books and magazines are housed on some nearby shelves.
With all of this inspiration within an arm's reach it's easy to come up with ideas for the cards, tags, bags, and boxes that I love to create. As I have said before I am most definitely addicted to paper crafting.
While I was pulling out some tiny hearts for my first card I came across a strip of plastic with red puffy letters on it that said "Love" and decided to use them for my second card. Once again I used my heart punches to punch out a plain and a scalloped heart. Paper pierced the white heart to make it look lacy. Stamped a branch from PaperTrey Ink's "Take a Bough" clear stamp set across the hearts to give the "love birds" from A Muse Artstamps a place to sit. Last night I chose to use different colors and sizes of epoxy hearts for the leaves on the branch. Today I am thinking just red ones would look better. I am most definitely my own worst critic.
This chipboard elephant was in my stash. Wish I could remember where it came from. MaryBeth, do you know? Either you gave it to me or I bought it in some set when I was with you. The hearts on the elephant, the ones coming out his trunk, and the ones on the little bird all cried out "valentine" to me. Embossed the layering paper and punched a hole in it after I had adhered it to a blank card. Used a Marvy metal ring to highlight the "Be Mine" text and attached it in the middle of the hole I had punched. When the card is opened you can still see the text.
Two very dear friends are coming for dinner tonight so I need to leave my little corner of the world to do some grocery shopping.
Enjoy your day!
Carol
Do you remember the song "In My Own Little Corner" from Roger and Hammerstein's Cinderella? I often think of that song and of the scene that song was sung in when I sit here working "in my own little corner". I spend more time in the corner of my dining room than I do in any other room in our home. It's in this corner that I plan and prep my early childhood teacher trainings, my afterschool classes for children, and my adult education classes. I sit here when I am planning meals and creating shopping lists. It's in this corner that I dream of and create all of my paper crafts.
As I sit here typing this post my valentine wooden stamps are displayed on the wall directly above me. Rolls of red, pink, and white ribbons are strung on the paper towel rack below my stamp shelves. My heart paper punches are to the right of me along with my valentine and other embossing folders, my clear valentine stamps, and my heart Nestabilities.
I often fidget with the heart shaped buttons that are sitting here next to me in a small red heart shaped bowl. I have a plastic drawer that is filled with valentine papers and some smaller drawers that hold my valentine stickers, brads, and embellishments.
My collection of papercrafting books and magazines are housed on some nearby shelves.
With all of this inspiration within an arm's reach it's easy to come up with ideas for the cards, tags, bags, and boxes that I love to create. As I have said before I am most definitely addicted to paper crafting.
When I glanced up at my shelves last night my "Love Goes Round" stamp from Stampendous caught my eye. I found some musical notes paper in my Sassafras Nerdy Bird Wee bundle and decided it was just what I needed for the card I had sketched. Had some ribbon with tiny hearts on it and musical notes brads in my stash so I grabbed them. I used a few of my Marvy Uchida heart punches to punch some plain and scalloped hearts. After I assembled them I ran them through a Cuttlebug embossing folder. I used red tag for the "lace" on my hearts because I thought it would draw out the red on the musical notes. As I sit here looking at the card right now I am thinking I may have liked white "lace" better so I'll try it that way on a similar card.
While I was pulling out some tiny hearts for my first card I came across a strip of plastic with red puffy letters on it that said "Love" and decided to use them for my second card. Once again I used my heart punches to punch out a plain and a scalloped heart. Paper pierced the white heart to make it look lacy. Stamped a branch from PaperTrey Ink's "Take a Bough" clear stamp set across the hearts to give the "love birds" from A Muse Artstamps a place to sit. Last night I chose to use different colors and sizes of epoxy hearts for the leaves on the branch. Today I am thinking just red ones would look better. I am most definitely my own worst critic.
This chipboard elephant was in my stash. Wish I could remember where it came from. MaryBeth, do you know? Either you gave it to me or I bought it in some set when I was with you. The hearts on the elephant, the ones coming out his trunk, and the ones on the little bird all cried out "valentine" to me. Embossed the layering paper and punched a hole in it after I had adhered it to a blank card. Used a Marvy metal ring to highlight the "Be Mine" text and attached it in the middle of the hole I had punched. When the card is opened you can still see the text.
Two very dear friends are coming for dinner tonight so I need to leave my little corner of the world to do some grocery shopping.
Enjoy your day!
Carol
Saturday, January 22, 2011
Bridal Shower Card
Hi Everyone!
It's been a busy day here. I have a friend who requested a bridal shower card, a friend who requested 5 valentine cards, and another friend who wanted some thank you cards. So in between laundry, cleaning, and prepping next week's workshops I made some cards.
I used an umbrella from Lawn Fawn's "Partly Cloudy" clear stamp set for this bridal shower card and gift tag. After I stamped the umbrella and the text I ran the white tag through a Cuttlebug Hearts embossing folder. The text was created with a clear stamp from Hero Art's "Best Wishes" set. The tiny hearts on the card and tag are "scrap hearts" that come from a Martha Stewart's hearts edger punch. There are tiny white pearl embellishments on the umbrellas.
I made a variety of thank you cards. These cards were made with paper from Cosmo Cricket's Material Girl block. I stamped a spool of thread from PaperTrey Ink's "Quilter's Sampler" set on the first card and a pincushion from Hero Art's "Sew Artsy" clear set on the second one. The "Sew Much" text stamp is from Stampabilities.
Here's one of the valentines that I made. I used Hearts Nestabilities to cut out the 2 hearts, a Martha Stewart edger punch on the layering paper. The love birds and the text were stamped with A Muse Artstamps. The branch is from the Hero Arts "Trees, Birds & Messages" clear stamp set.
Have a great night!
Carol
It's been a busy day here. I have a friend who requested a bridal shower card, a friend who requested 5 valentine cards, and another friend who wanted some thank you cards. So in between laundry, cleaning, and prepping next week's workshops I made some cards.
I used an umbrella from Lawn Fawn's "Partly Cloudy" clear stamp set for this bridal shower card and gift tag. After I stamped the umbrella and the text I ran the white tag through a Cuttlebug Hearts embossing folder. The text was created with a clear stamp from Hero Art's "Best Wishes" set. The tiny hearts on the card and tag are "scrap hearts" that come from a Martha Stewart's hearts edger punch. There are tiny white pearl embellishments on the umbrellas.
I made a variety of thank you cards. These cards were made with paper from Cosmo Cricket's Material Girl block. I stamped a spool of thread from PaperTrey Ink's "Quilter's Sampler" set on the first card and a pincushion from Hero Art's "Sew Artsy" clear set on the second one. The "Sew Much" text stamp is from Stampabilities.
Here's one of the valentines that I made. I used Hearts Nestabilities to cut out the 2 hearts, a Martha Stewart edger punch on the layering paper. The love birds and the text were stamped with A Muse Artstamps. The branch is from the Hero Arts "Trees, Birds & Messages" clear stamp set.
Have a great night!
Carol
Saturday, January 15, 2011
Saturday's Valentines
Good Morning Everyone!
Not exactly sure why I got up at 7 AM on a Saturday! I've had my tea, read my e-mails, and now I am ready to start my day.
Today's first valentine was created with some Stampendous stamps. The window and the "stamp" that the text is stamped on were created with Sizzix dies. I used a Martha Stewart edger punch to create the lacy heart border for the valence on the windows.
I love all things punny so when I saw the idea for this card in an old issue of Scrapbooks, ETC. I knew I wanted to add it to my collection. Found an A Muse whale stamp on their web site that I HAD to own. Used an EK Success punch to create the strips of waves. Paper pierced the cloud to make it look as if it were stitched onto the card.
Came across the blue letters on this card while I was once again organizing my alphabet drawer. Even in the photograph the embossed hearts on the yellow tag pop out at me. They were created with a Cuttlebug hearts embossing folder that my friend Peggy bought me last year. Thanks, Peggy. If you study my valentines you'll see I've been using it a lot this year.
Here it is being used again on this "Bee Mine" card. The bee is from a box of Debbie Mumm chipboard embellishments. If you purchased a box of baby embellishments you have some of those bees.
Have a great day!
Carol
Not exactly sure why I got up at 7 AM on a Saturday! I've had my tea, read my e-mails, and now I am ready to start my day.
Today's first valentine was created with some Stampendous stamps. The window and the "stamp" that the text is stamped on were created with Sizzix dies. I used a Martha Stewart edger punch to create the lacy heart border for the valence on the windows.
I love all things punny so when I saw the idea for this card in an old issue of Scrapbooks, ETC. I knew I wanted to add it to my collection. Found an A Muse whale stamp on their web site that I HAD to own. Used an EK Success punch to create the strips of waves. Paper pierced the cloud to make it look as if it were stitched onto the card.
Came across the blue letters on this card while I was once again organizing my alphabet drawer. Even in the photograph the embossed hearts on the yellow tag pop out at me. They were created with a Cuttlebug hearts embossing folder that my friend Peggy bought me last year. Thanks, Peggy. If you study my valentines you'll see I've been using it a lot this year.
Here it is being used again on this "Bee Mine" card. The bee is from a box of Debbie Mumm chipboard embellishments. If you purchased a box of baby embellishments you have some of those bees.
Have a great day!
Carol
Monday, August 9, 2010
Halloween Day 2
Hi Everyone!
Another hot and humid day. I think this has been the most humid summer in years. I'd wish it were Fall except that would mean Winter was on its way. As much as I dislike humidity I am even less fond of snow and ice.
Today’s cards are all easy to create. Just study the photographs of my cards and then use Halloween paper from your stash to create cards of your own.

The images on this first card were cut from a 12" x 12" paper stack of Debbie Mumm paper. Basically I cut the images and glued them to a sheet of orange layering paper. Then I put the paper in the Cuttlebug "Tiny Bubbles" embossing folder and ran it through my Cuttlebug. I think that folder makes the paper look as if it is quilted. I also feel that the images are now anchored firmly to the layering paper.

I used parts of 2 papers from a K and Company Halloween 12" x 12" paper stack to create this card. There is a page in that stack that is completed filled with jack o’lanterns. I fussy cut some of them and glued them to a sheet of purple sky tag. I put the paper in a Cuttlebug spider web embossing folder and ran it through my Cuttlebug. The purple tag had a white core so when I embossed it some of the tag cracked and the white core showed through the card. I don’t like that look so I put some tiny bats on some of the larger "white cracks". Tip: I used a Picksey Pick-up to pick up each bat, swiped it across the top of a wide tip glue pen, and then glued it to the card. The "spooky" message was created with Maya Road Rubons.


These last 2 cards have the same blueprint. If you have been following my blog you know it’s a blueprint that I use often. I traced over the spider webs with a Pinpoint Roller Quickie Glue pen and then sprinkled fine white glitter over the glue. I tapped off the excess glitter and was left with sparkling spider webs. I like those glue pens. The barrel on them is clear so it’s easy to see how much glue is left inside the pen. The pens don’t clog either so they are easy to use.
The spiders are "Favorite Findings". The pumpkin on the first card was cut from a medium pumpkin Nestability. "Trick or Treat" was stamped from a Northwoods wooden stamp. The pumpkin on the second card was stamped with a Recollections wooden stamp.
Another hot and humid day. I think this has been the most humid summer in years. I'd wish it were Fall except that would mean Winter was on its way. As much as I dislike humidity I am even less fond of snow and ice.
Today’s cards are all easy to create. Just study the photographs of my cards and then use Halloween paper from your stash to create cards of your own.

The images on this first card were cut from a 12" x 12" paper stack of Debbie Mumm paper. Basically I cut the images and glued them to a sheet of orange layering paper. Then I put the paper in the Cuttlebug "Tiny Bubbles" embossing folder and ran it through my Cuttlebug. I think that folder makes the paper look as if it is quilted. I also feel that the images are now anchored firmly to the layering paper.

I used parts of 2 papers from a K and Company Halloween 12" x 12" paper stack to create this card. There is a page in that stack that is completed filled with jack o’lanterns. I fussy cut some of them and glued them to a sheet of purple sky tag. I put the paper in a Cuttlebug spider web embossing folder and ran it through my Cuttlebug. The purple tag had a white core so when I embossed it some of the tag cracked and the white core showed through the card. I don’t like that look so I put some tiny bats on some of the larger "white cracks". Tip: I used a Picksey Pick-up to pick up each bat, swiped it across the top of a wide tip glue pen, and then glued it to the card. The "spooky" message was created with Maya Road Rubons.


These last 2 cards have the same blueprint. If you have been following my blog you know it’s a blueprint that I use often. I traced over the spider webs with a Pinpoint Roller Quickie Glue pen and then sprinkled fine white glitter over the glue. I tapped off the excess glitter and was left with sparkling spider webs. I like those glue pens. The barrel on them is clear so it’s easy to see how much glue is left inside the pen. The pens don’t clog either so they are easy to use.
The spiders are "Favorite Findings". The pumpkin on the first card was cut from a medium pumpkin Nestability. "Trick or Treat" was stamped from a Northwoods wooden stamp. The pumpkin on the second card was stamped with a Recollections wooden stamp.
Subscribe to:
Posts (Atom)