Good Morning!
It's nice to see a blue sky again today. Now if the sun could warm us up just a little! I celebrated my 58th birthday yesterday. I am having one of those wonderful birthdays where the celebrating goes on and on. It started with a package that was overflowing with papercrafting goodies from MaryBeth and has continued with a pre-birthday dinner at Jeanne's last Sunday, a day of shopping and eating out with Jeanne yesterday, a family party hosted by Marie tonight, and Chinese food with Patty next Thursday. I have daffodils from Diane on the dining room table and daisies from Marie on the kitchen counter and in the bay window. There are cards on the mantle and cake balls in the refrigerator. Fun! Fun! Fun!
In between planning and prepping some early childhood teacher trainings and a cooking class for a new afterschool program, I've been busy creating cards for online challenges and trying to rebuild my card inventory.
The minute I saw this wooden "Flower Frog" stamp from Hero Arts I knew I had to add it to my collection. Don't those big eyes and that wide smile on his face make you smile? I have a variety of great text messages I plan to use with that frog, but the first card I created with him was this "Hoppy Birthday!" card. I created the background cattails by adding Stickles to a long grass stamp from A Muse Artstamps. The clouds are die cuts from PaperTrey Ink that I paper pierced. The full view frog is attached to the card with foam tape. The frog's eyes are highlighted with black enamel accents.
I have a stack of cards that need to be photographed, but I need to focus on planning my workshops today. I'll try to post more cards sometime this weekend.
Would you like to see photographs of some of the goodies I have purchased recently and where I got them? If so, please leave me a comment and I will photograph the goodies while I am taking pictures of my cards.
Talk to you very soon.
Carol
Search This Blog
Showing posts with label A Muse Artstamps. Show all posts
Friday, March 4, 2011
Saturday, February 19, 2011
Hoppy the Bunny
Happy Saturday Everyone!
I am so excited to announce that I won the Impression Obsession drawing after I submitted a cupcake card into their It's a Cupcake Kind of Day challenge. I won a gift certificate to their online store and cannot wait to choose my new stamps. Be sure to start following their blog and pay attention to the challenges so that you can submit cards too. When you win you get to add a blinking widget to your blog.
I have been busy creating cards and paper crafts for St. Patrick's Day, Spring, Easter, and Mother's Day. There's still snow outside, but there's spring everywhere you look inside my house.
The blank card I used for this card is hot pink not red like the camera made it look. I stamped the Tree for All Seasons from Stamps by Judith onto the layering paper and then ran the paper through my newest Cuttlebug embossing folder. Then I punched out lots of baskets and eggs from a Martha Stewart Easter basket/eggs punch that I purchased last year after Easter. When you punch you get one basket and 4 eggs. I set most of the baskets aside to use on other cards, but I cut the handle off of one basket to create a stand for the tree. I punched out a chick from another Martha Stewart punch and put it "in the stand". After I studied the picture I added a tiny black rhinestone to the chick for an eye. I used mini glue dots to attach all of those tiny eggs to the tree. Suggestion...Put the eggs on the strip of mini dots and then pull them off of the paper one at a time as you put them on the card.
Hoppy the Bunny from A Muse Artstamps is doing the Bunny Hop with his friends. Hoppy is on sale on their web site for just $2.00! You don't want to miss out on a bargain like that one! I stamped Hoppy over and over again across the card and then used my watercolor pencils to color in each bunny. I'm not sure that you can see it in the picture, but I tapped a pink American Crafts glitter marker onto each bunny's nose. Used mini glue dots to attach each tiny pompom cottontail. The butterfly is from a Fiskars hand punch and the flowers are too. I used my Martha Stewart fringing scissors to cut the grass.
That's all I have time to share today, but I'll be back again soon with more ideas for you. Please remember that all bloggers love comments. Please send some to my blog instead of to my e-mail. Thank you in advance for taking the time to comment.
Have a great day!
Carol
I am so excited to announce that I won the Impression Obsession drawing after I submitted a cupcake card into their It's a Cupcake Kind of Day challenge. I won a gift certificate to their online store and cannot wait to choose my new stamps. Be sure to start following their blog and pay attention to the challenges so that you can submit cards too. When you win you get to add a blinking widget to your blog.
I have been busy creating cards and paper crafts for St. Patrick's Day, Spring, Easter, and Mother's Day. There's still snow outside, but there's spring everywhere you look inside my house.
The blank card I used for this card is hot pink not red like the camera made it look. I stamped the Tree for All Seasons from Stamps by Judith onto the layering paper and then ran the paper through my newest Cuttlebug embossing folder. Then I punched out lots of baskets and eggs from a Martha Stewart Easter basket/eggs punch that I purchased last year after Easter. When you punch you get one basket and 4 eggs. I set most of the baskets aside to use on other cards, but I cut the handle off of one basket to create a stand for the tree. I punched out a chick from another Martha Stewart punch and put it "in the stand". After I studied the picture I added a tiny black rhinestone to the chick for an eye. I used mini glue dots to attach all of those tiny eggs to the tree. Suggestion...Put the eggs on the strip of mini dots and then pull them off of the paper one at a time as you put them on the card.
Hoppy the Bunny from A Muse Artstamps is doing the Bunny Hop with his friends. Hoppy is on sale on their web site for just $2.00! You don't want to miss out on a bargain like that one! I stamped Hoppy over and over again across the card and then used my watercolor pencils to color in each bunny. I'm not sure that you can see it in the picture, but I tapped a pink American Crafts glitter marker onto each bunny's nose. Used mini glue dots to attach each tiny pompom cottontail. The butterfly is from a Fiskars hand punch and the flowers are too. I used my Martha Stewart fringing scissors to cut the grass.
That's all I have time to share today, but I'll be back again soon with more ideas for you. Please remember that all bloggers love comments. Please send some to my blog instead of to my e-mail. Thank you in advance for taking the time to comment.
Have a great day!
Carol
Tuesday, February 8, 2011
More Valentines!
Good Morning Everyone!
I cannot believe that I haven't posted for 5 days. I guess I was too busy creating cards to notice!
Most of you have seen "Riley" cards in other posts. Riley is Jeanne's adorable little dog who NEVER stops barking. Since the "puppy with heart" stamp from Serendipity stamps reminds me of Riley I use it over and over again when I am creating cards for Jeanne. This card will be Jeanne's valentine this year. I found the ribbon in my stash and thought the words on it suited Riley's relationship with Jeanne perfectly.
Marie has become my tea drinking buddy. She's a coffee drinker in the AM, but a tea drinker after dinner. Every night she makes each of us a cup of tea with a splash of milk and Splenda. This card will be Marie's valentine.
The background papers are from the American Crafts "Abode" collection. The "big cup" is a Hero Arts cling stamp. The text was created with an
A Muse Artstamps.
As you know I LOVE everything about SEI. I follow their blog on a daily basis. It's through their blog that I learn about their products. It's through their blog that I become inspired on ways to use their products. It's through their blog that I learn wonderfully creative ideas and techniques. Last week I read Audrey Yeager's "Heart Garland Tutorial" and immediately sat down and created some of those hearts. I hung mine from pegs on my favorite display shelves that MaryBeth gave me several years ago. I am hoping to make more of them so I can hang some in my bay window. Valentine's Day is coming fast, but happily the hearts are quick and easy to create.
My "Chickie with a heart balloon" valentines received such a positive response that I made more of them. This card uses the same sketch I used last week, but I changed the layering paper and love this card even more. The layering paper is from the American Crafts "Abode" collection. We are going to make this exact card in my paper crafting class tonight for Lexington Community Education. The chickie stamp is one of the many chickie stamps that Denami Designs creates for us.
I am planning to spend the day cooking. My schedule is happily becoming packed with teacher trainings and classes so I want to fill my freezer with meals we can grab.
Have a great day!
Carol
I cannot believe that I haven't posted for 5 days. I guess I was too busy creating cards to notice!
Most of you have seen "Riley" cards in other posts. Riley is Jeanne's adorable little dog who NEVER stops barking. Since the "puppy with heart" stamp from Serendipity stamps reminds me of Riley I use it over and over again when I am creating cards for Jeanne. This card will be Jeanne's valentine this year. I found the ribbon in my stash and thought the words on it suited Riley's relationship with Jeanne perfectly.
Marie has become my tea drinking buddy. She's a coffee drinker in the AM, but a tea drinker after dinner. Every night she makes each of us a cup of tea with a splash of milk and Splenda. This card will be Marie's valentine.
The background papers are from the American Crafts "Abode" collection. The "big cup" is a Hero Arts cling stamp. The text was created with an
A Muse Artstamps.
As you know I LOVE everything about SEI. I follow their blog on a daily basis. It's through their blog that I learn about their products. It's through their blog that I become inspired on ways to use their products. It's through their blog that I learn wonderfully creative ideas and techniques. Last week I read Audrey Yeager's "Heart Garland Tutorial" and immediately sat down and created some of those hearts. I hung mine from pegs on my favorite display shelves that MaryBeth gave me several years ago. I am hoping to make more of them so I can hang some in my bay window. Valentine's Day is coming fast, but happily the hearts are quick and easy to create.
My "Chickie with a heart balloon" valentines received such a positive response that I made more of them. This card uses the same sketch I used last week, but I changed the layering paper and love this card even more. The layering paper is from the American Crafts "Abode" collection. We are going to make this exact card in my paper crafting class tonight for Lexington Community Education. The chickie stamp is one of the many chickie stamps that Denami Designs creates for us.
I am planning to spend the day cooking. My schedule is happily becoming packed with teacher trainings and classes so I want to fill my freezer with meals we can grab.
Have a great day!
Carol
Monday, January 31, 2011
Chickie with Heart Balloon
Good Morning Everyone!
I see a bright blue sky through my dining room window. Lots of squirrels running around out there right now. They must be stocking up on food before the next storm arrives.
Covered the chickie's heart balloon with an epoxy heart sticker to make her umbrella. LOVE the cloud dies I used from PaperTrey Ink. I paper pierced them before I adhered the layering paper to the blank card.
You've seen me use the sketch for this card over and over again. The chickies are on 1.25" squares and are mounted on 1.5" squares. The dotted embossing definitely adds some fun texture to the card. Button is from my stash. I think it's a Favorite Findings, but I am not positive.
Robbie laughed when he saw this card and commented "That's a lot of blank space!" but that's what I like about the card. I used a Cuttlebug Hearts embossing folder to emboss the layering paper. Covered the chickie's heart with an epoxy sticker.
I was imagining a flock of chicks floating through the air when I created this card. Used my PaperTrey Ink cloud dies again and paper pierced them again. Created the text on my computer.
I have a little rainbow thing going on here as the chicks line up. Stamped a chick about every .75" Red heart jewels on red heart layering paper. They work. The jewels catch the light.
I thought about not posting this card. At least not yet because I know it needs something else, but I haven't figured out what that something is. After I studied the photograph of it I anchored the corners down better as I hate an untidy looking card. The layering paper is embossed. I'm afraid to stamp a text at this point because I'm not sure how cleanly I could stamp on the embossing.
Off for a day of errands with Marie. Have a good one!
Carol
I see a bright blue sky through my dining room window. Lots of squirrels running around out there right now. They must be stocking up on food before the next storm arrives.
Yesterday I played around with mainly one stamp called "Chickie with Heart Balloon" from Denami Design. The "Happy Valentine's Day" text is an A Muse Artstamp and the red heart on the first card is from Rubber Soul. All 3 stamps are on the tiny side, but all of them still give a clean impression when I stamp them which I believe is a testament to their quality.
Covered the chickie's heart balloon with an epoxy heart sticker to make her umbrella. LOVE the cloud dies I used from PaperTrey Ink. I paper pierced them before I adhered the layering paper to the blank card.
You've seen me use the sketch for this card over and over again. The chickies are on 1.25" squares and are mounted on 1.5" squares. The dotted embossing definitely adds some fun texture to the card. Button is from my stash. I think it's a Favorite Findings, but I am not positive.
Robbie laughed when he saw this card and commented "That's a lot of blank space!" but that's what I like about the card. I used a Cuttlebug Hearts embossing folder to emboss the layering paper. Covered the chickie's heart with an epoxy sticker.
I was imagining a flock of chicks floating through the air when I created this card. Used my PaperTrey Ink cloud dies again and paper pierced them again. Created the text on my computer.
I have a little rainbow thing going on here as the chicks line up. Stamped a chick about every .75" Red heart jewels on red heart layering paper. They work. The jewels catch the light.
I thought about not posting this card. At least not yet because I know it needs something else, but I haven't figured out what that something is. After I studied the photograph of it I anchored the corners down better as I hate an untidy looking card. The layering paper is embossed. I'm afraid to stamp a text at this point because I'm not sure how cleanly I could stamp on the embossing.
Off for a day of errands with Marie. Have a good one!
Carol
Labels:
A Muse Artstamps,
Cuttlebug,
Denami Design,
PaperTrey Ink,
Rubber Soul
Saturday, January 29, 2011
In My Own Little Corner
Good Morning Everyone!
As I sit here typing this post my valentine wooden stamps are displayed on the wall directly above me. Rolls of red, pink, and white ribbons are strung on the paper towel rack below my stamp shelves. My heart paper punches are to the right of me along with my valentine and other embossing folders, my clear valentine stamps, and my heart Nestabilities.
I often fidget with the heart shaped buttons that are sitting here next to me in a small red heart shaped bowl. I have a plastic drawer that is filled with valentine papers and some smaller drawers that hold my valentine stickers, brads, and embellishments.
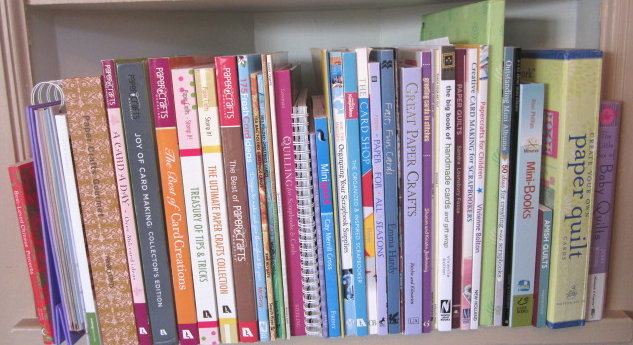
My collection of papercrafting books and magazines are housed on some nearby shelves.
With all of this inspiration within an arm's reach it's easy to come up with ideas for the cards, tags, bags, and boxes that I love to create. As I have said before I am most definitely addicted to paper crafting.
While I was pulling out some tiny hearts for my first card I came across a strip of plastic with red puffy letters on it that said "Love" and decided to use them for my second card. Once again I used my heart punches to punch out a plain and a scalloped heart. Paper pierced the white heart to make it look lacy. Stamped a branch from PaperTrey Ink's "Take a Bough" clear stamp set across the hearts to give the "love birds" from A Muse Artstamps a place to sit. Last night I chose to use different colors and sizes of epoxy hearts for the leaves on the branch. Today I am thinking just red ones would look better. I am most definitely my own worst critic.
This chipboard elephant was in my stash. Wish I could remember where it came from. MaryBeth, do you know? Either you gave it to me or I bought it in some set when I was with you. The hearts on the elephant, the ones coming out his trunk, and the ones on the little bird all cried out "valentine" to me. Embossed the layering paper and punched a hole in it after I had adhered it to a blank card. Used a Marvy metal ring to highlight the "Be Mine" text and attached it in the middle of the hole I had punched. When the card is opened you can still see the text.
Two very dear friends are coming for dinner tonight so I need to leave my little corner of the world to do some grocery shopping.
Enjoy your day!
Carol
Do you remember the song "In My Own Little Corner" from Roger and Hammerstein's Cinderella? I often think of that song and of the scene that song was sung in when I sit here working "in my own little corner". I spend more time in the corner of my dining room than I do in any other room in our home. It's in this corner that I plan and prep my early childhood teacher trainings, my afterschool classes for children, and my adult education classes. I sit here when I am planning meals and creating shopping lists. It's in this corner that I dream of and create all of my paper crafts.
As I sit here typing this post my valentine wooden stamps are displayed on the wall directly above me. Rolls of red, pink, and white ribbons are strung on the paper towel rack below my stamp shelves. My heart paper punches are to the right of me along with my valentine and other embossing folders, my clear valentine stamps, and my heart Nestabilities.
I often fidget with the heart shaped buttons that are sitting here next to me in a small red heart shaped bowl. I have a plastic drawer that is filled with valentine papers and some smaller drawers that hold my valentine stickers, brads, and embellishments.
My collection of papercrafting books and magazines are housed on some nearby shelves.
With all of this inspiration within an arm's reach it's easy to come up with ideas for the cards, tags, bags, and boxes that I love to create. As I have said before I am most definitely addicted to paper crafting.
When I glanced up at my shelves last night my "Love Goes Round" stamp from Stampendous caught my eye. I found some musical notes paper in my Sassafras Nerdy Bird Wee bundle and decided it was just what I needed for the card I had sketched. Had some ribbon with tiny hearts on it and musical notes brads in my stash so I grabbed them. I used a few of my Marvy Uchida heart punches to punch some plain and scalloped hearts. After I assembled them I ran them through a Cuttlebug embossing folder. I used red tag for the "lace" on my hearts because I thought it would draw out the red on the musical notes. As I sit here looking at the card right now I am thinking I may have liked white "lace" better so I'll try it that way on a similar card.
While I was pulling out some tiny hearts for my first card I came across a strip of plastic with red puffy letters on it that said "Love" and decided to use them for my second card. Once again I used my heart punches to punch out a plain and a scalloped heart. Paper pierced the white heart to make it look lacy. Stamped a branch from PaperTrey Ink's "Take a Bough" clear stamp set across the hearts to give the "love birds" from A Muse Artstamps a place to sit. Last night I chose to use different colors and sizes of epoxy hearts for the leaves on the branch. Today I am thinking just red ones would look better. I am most definitely my own worst critic.
This chipboard elephant was in my stash. Wish I could remember where it came from. MaryBeth, do you know? Either you gave it to me or I bought it in some set when I was with you. The hearts on the elephant, the ones coming out his trunk, and the ones on the little bird all cried out "valentine" to me. Embossed the layering paper and punched a hole in it after I had adhered it to a blank card. Used a Marvy metal ring to highlight the "Be Mine" text and attached it in the middle of the hole I had punched. When the card is opened you can still see the text.
Two very dear friends are coming for dinner tonight so I need to leave my little corner of the world to do some grocery shopping.
Enjoy your day!
Carol
Friday, January 28, 2011
Robot and Cupcake Valentines
Good Morning Everyone!
I purchased a dcwv "All About Boys" small stack at JoAnn's the other day. It's filled with all sorts of cool papers with outer space, pirate, zoo, under the sea, cowboy, superhero, and robot themes. I just had to use some of the robot papers to create more valentines along with the Stampendous robot stamp I showed you a few blogs ago. This time I masked off the text from the stamp and used just it on some punched out hearts. I positioned the text on the hearts and the hearts on the cards in such a way to make them look like word balloons.
I'm nearly out of what seemed to be an endless supply of Lil' Robots chipboard pieces from My Mind's Eye. I added a few of the ones I had left to my valentines. The tiny "Happy Valentine's Day" message was created with an A Muse Artstamp.
Just couldn't pass up the opportunity to use my Hero Arts large cupcake cling stamp on some valentines. After all it does have some hearts on it. As I have done in the past on birthday cards I stamped the "muffin wrapper" part of the stamp onto one patterned paper and the "frosting" part of the stamp on a different patterned paper. I fussy cut both images out and ran the "muffin wrapper" through my crimper before I adhered it to the layering paper. I used dimensional tape to attach the "frosting" to the layering paper. The text is stamped on some Martha Stewart "ribbon style tags" that I spotted at TJ Maxx a few days ago.
Now I need to stop creating cards for a few hours and creatively do some cleaning!
Have a good day!
Carol
I purchased a dcwv "All About Boys" small stack at JoAnn's the other day. It's filled with all sorts of cool papers with outer space, pirate, zoo, under the sea, cowboy, superhero, and robot themes. I just had to use some of the robot papers to create more valentines along with the Stampendous robot stamp I showed you a few blogs ago. This time I masked off the text from the stamp and used just it on some punched out hearts. I positioned the text on the hearts and the hearts on the cards in such a way to make them look like word balloons.
I'm nearly out of what seemed to be an endless supply of Lil' Robots chipboard pieces from My Mind's Eye. I added a few of the ones I had left to my valentines. The tiny "Happy Valentine's Day" message was created with an A Muse Artstamp.
Just couldn't pass up the opportunity to use my Hero Arts large cupcake cling stamp on some valentines. After all it does have some hearts on it. As I have done in the past on birthday cards I stamped the "muffin wrapper" part of the stamp onto one patterned paper and the "frosting" part of the stamp on a different patterned paper. I fussy cut both images out and ran the "muffin wrapper" through my crimper before I adhered it to the layering paper. I used dimensional tape to attach the "frosting" to the layering paper. The text is stamped on some Martha Stewart "ribbon style tags" that I spotted at TJ Maxx a few days ago.
Now I need to stop creating cards for a few hours and creatively do some cleaning!
Have a good day!
Carol
Labels:
A Muse Artstamps,
dcwv,
Hero Arts,
My Mind's Eye
Saturday, January 22, 2011
Bridal Shower Card
Hi Everyone!
It's been a busy day here. I have a friend who requested a bridal shower card, a friend who requested 5 valentine cards, and another friend who wanted some thank you cards. So in between laundry, cleaning, and prepping next week's workshops I made some cards.
I used an umbrella from Lawn Fawn's "Partly Cloudy" clear stamp set for this bridal shower card and gift tag. After I stamped the umbrella and the text I ran the white tag through a Cuttlebug Hearts embossing folder. The text was created with a clear stamp from Hero Art's "Best Wishes" set. The tiny hearts on the card and tag are "scrap hearts" that come from a Martha Stewart's hearts edger punch. There are tiny white pearl embellishments on the umbrellas.
I made a variety of thank you cards. These cards were made with paper from Cosmo Cricket's Material Girl block. I stamped a spool of thread from PaperTrey Ink's "Quilter's Sampler" set on the first card and a pincushion from Hero Art's "Sew Artsy" clear set on the second one. The "Sew Much" text stamp is from Stampabilities.
Here's one of the valentines that I made. I used Hearts Nestabilities to cut out the 2 hearts, a Martha Stewart edger punch on the layering paper. The love birds and the text were stamped with A Muse Artstamps. The branch is from the Hero Arts "Trees, Birds & Messages" clear stamp set.
Have a great night!
Carol
It's been a busy day here. I have a friend who requested a bridal shower card, a friend who requested 5 valentine cards, and another friend who wanted some thank you cards. So in between laundry, cleaning, and prepping next week's workshops I made some cards.
I used an umbrella from Lawn Fawn's "Partly Cloudy" clear stamp set for this bridal shower card and gift tag. After I stamped the umbrella and the text I ran the white tag through a Cuttlebug Hearts embossing folder. The text was created with a clear stamp from Hero Art's "Best Wishes" set. The tiny hearts on the card and tag are "scrap hearts" that come from a Martha Stewart's hearts edger punch. There are tiny white pearl embellishments on the umbrellas.
I made a variety of thank you cards. These cards were made with paper from Cosmo Cricket's Material Girl block. I stamped a spool of thread from PaperTrey Ink's "Quilter's Sampler" set on the first card and a pincushion from Hero Art's "Sew Artsy" clear set on the second one. The "Sew Much" text stamp is from Stampabilities.
Here's one of the valentines that I made. I used Hearts Nestabilities to cut out the 2 hearts, a Martha Stewart edger punch on the layering paper. The love birds and the text were stamped with A Muse Artstamps. The branch is from the Hero Arts "Trees, Birds & Messages" clear stamp set.
Have a great night!
Carol
Sunday, August 8, 2010
Halloween
Happy Sunday Everyone!
Earlier today the air was cool and it felt like fall to me. I pulled out everything papercrafting that I own that is Halloween related because I plan to work on Halloween cards this week. Made just one card so far today. Robbie loves it because it has an owl on it.
I ran the small Nestability owl die through my Cuttlebug machine to cut out 2 owls. I attached the first one to the layering paper on my card. I cut the second owl apart to create the wings for the first owl. The hat, broom, legs, and bat are Recollections stickers.
I used the pink Marvy Uchida circle punch to create the moon. "Halloween is a Hoooooot" was stamped with an A Muse Artstamp. The branch was stamped with a stamp from PaperTrey Ink’s "Take a Bough" set. I was happy to see that it showed up on the paper that I stamped it on.
Be back tomorrow!
Carol
Earlier today the air was cool and it felt like fall to me. I pulled out everything papercrafting that I own that is Halloween related because I plan to work on Halloween cards this week. Made just one card so far today. Robbie loves it because it has an owl on it.
I ran the small Nestability owl die through my Cuttlebug machine to cut out 2 owls. I attached the first one to the layering paper on my card. I cut the second owl apart to create the wings for the first owl. The hat, broom, legs, and bat are Recollections stickers.I used the pink Marvy Uchida circle punch to create the moon. "Halloween is a Hoooooot" was stamped with an A Muse Artstamp. The branch was stamped with a stamp from PaperTrey Ink’s "Take a Bough" set. I was happy to see that it showed up on the paper that I stamped it on.
Be back tomorrow!
Carol
Labels:
A Muse Artstamps,
Nestabilities,
PaperTrey Ink
Sunday, August 1, 2010
Sympathy and Apology Cards
Happy Sunday Everyone!


The paper from SEI’s chocolat stack has just the elegance that I wanted for my sympathy cards. If you study these first 2 cards you will notice that I played around with the same blueprint when I created them. I’ve decided that I prefer the one that has the patterned paper at the top, the ribbon/bow in the center and the solid paper at the bottom. I think the patterned paper at the top helps lead your eye to the message at the bottom of the card. The card with the solid paper at the top feels bottom heavy to me. I added pearls to both of the cards. Although I seldom wear mine I love pearls. When I saw my mother wearing her pearls I always thought she looked very dressed up and beautiful and that’s how I wanted my sympathy cards to look

I’m happy with his card. I wasn’t sure where I wanted to place the sentiment and had accidentally glued my patterned paper onto the blank card before I made that decision. At that point rather then run the risk of stamping a sentiment that wasn’t clear and crisp directly onto my card I stamped it onto a coordinating strip of paper and added it to my card. The lettering on many of the stamps in this set is tiny and doesn’t require much ink so I like to practice with each of those stamps before I use them on my cards. Both of the papers I used on this card are also from SEI's chocolat stack.

I love this card. I think it looks elegant and tasteful. I used my corner rounder punch on the layering paper and on the card. I used a Martha Stewart butterfly punch to create the butterfly embellishment. I fashioned some antennae for the butterfly out of thin jewelry wire. I don’t think they show up in the photograph. Both of the papers I used on this card are from SEI's chocolat stack.
The Hero Arts ClearDesign Everyday Sayings stamp set features a large scope of phrases. I challenged myself this weekend and tried to incorporate each of those phrases into one or more cards. Turns out the challenge was easy for me. The hard part will be spreading those cards out over my blog posts for a week or longer as I am not good at keeping secrets when I am excited about something. The good news is I have already photographed all of the cards and edited my photographs.
I feel that sympathy cards don’t need to be dark and dreary. A touch of color may be just what it takes to brighten someone’s day. I remember when our mother passed away my sister Paula insisted upon wearing a bright outfit to the funeral because our mother had bought it for her and had loved the colors in it. Sometimes something that is beautiful and elegant makes us cry. Sometimes crying helps us cope with a loss.


The paper from SEI’s chocolat stack has just the elegance that I wanted for my sympathy cards. If you study these first 2 cards you will notice that I played around with the same blueprint when I created them. I’ve decided that I prefer the one that has the patterned paper at the top, the ribbon/bow in the center and the solid paper at the bottom. I think the patterned paper at the top helps lead your eye to the message at the bottom of the card. The card with the solid paper at the top feels bottom heavy to me. I added pearls to both of the cards. Although I seldom wear mine I love pearls. When I saw my mother wearing her pearls I always thought she looked very dressed up and beautiful and that’s how I wanted my sympathy cards to look

I’m happy with his card. I wasn’t sure where I wanted to place the sentiment and had accidentally glued my patterned paper onto the blank card before I made that decision. At that point rather then run the risk of stamping a sentiment that wasn’t clear and crisp directly onto my card I stamped it onto a coordinating strip of paper and added it to my card. The lettering on many of the stamps in this set is tiny and doesn’t require much ink so I like to practice with each of those stamps before I use them on my cards. Both of the papers I used on this card are also from SEI's chocolat stack.

I love this card. I think it looks elegant and tasteful. I used my corner rounder punch on the layering paper and on the card. I used a Martha Stewart butterfly punch to create the butterfly embellishment. I fashioned some antennae for the butterfly out of thin jewelry wire. I don’t think they show up in the photograph. Both of the papers I used on this card are from SEI's chocolat stack.
The phrase "I’m sorry" is included in the Hero Arts Everyday Sayings stamp set. I had to really think about how I would use this stamp because I feel that no matter how hard it might be "I’m sorry" and all life changing messages should be delivered face to face. I actually fell into a great article the other night called "How to Apologize". I highly recommend that everyone take the time to read that article because at one time or another each of us has needed/will need to apologize to someone. Maybe an "I’m sorry" card could be the place to write out an apology which could be handed to someone as you apologize face to face.
I used the "Posey Penguin" from Memory Box stamps on this card. The paper is from SEI’s Poppy paper stack. The blank card is from
A Muse Artstamps. The card is smaller than most of the other cards I create, but I felt it worked perfectly for the card I wanted.
This card has a "Sun Days" stamp from Penny Black stamped on it. I added some gems to add a little sparkle to the card. The butterfly was punched from an EK Success small butterfly punch.
Labels:
A Muse Artstamps,
EK Success,
Hero Arts,
Memory Box,
Penny Black,
SEI
Thursday, July 22, 2010
Songbirds
Hi Everyone!

The tiny bird on this card was created with the "Tiny Bird" stamp from A Muse Artstamps. "Happy Bird Day to You" is a stamp from Stampabilities.
Today I used paper from the dcwv Songbird 12" x 12" block to create some all occasion cards. There are 2 pages each of 18 designs in the block. One set of pages is filled with birdhouses that are different colors, sizes, and shapes. Some of them are glittered. I used some of those birdhouses on today’s cards and have lots of them left to use on another day. I think they’d look wonderful with a little holly on them for Christmas cards. I will try that one of these days. Oh, and a little snow on them would be great too! Maybe snow created with a white Puffy Velvet Fabric Marker.
I used a Hero Arts wooden stamp called "Sweet Bird" on this card. "Hello" was created with an A Muse Artstamp.
The other birds on these cards were created with stamps from the Hero Arts "Decorative Birds" set. There are 4 different birds in the set. Some have long legs and others have short ones. The legs can be masked and then som
e of the birds will appear to be flying.

The tiny bird on this card was created with the "Tiny Bird" stamp from A Muse Artstamps. "Happy Bird Day to You" is a stamp from Stampabilities.
Labels:
A Muse Artstamps,
dcwv,
Hero Arts,
Stampabilities
Subscribe to:
Posts (Atom)