Search This Blog

Monday, May 30, 2011

Gift bags and Gift cards

Hi Everyone!

I hope that you enjoyed your Memorial Day weekend.  Mine was very busy and a lot of fun. Three friends came here on Saturday to create bridal shower favors for Angela's son and future daughter-in-law.  We were a great team and within a few short hours created 50 favors. Unfortunately I didn't take any pictures, but I can tell you about them.  We used Teri Anderson's Tea Sleeve Tutorial and Andres and Maggie's wedding colors of purple, green, gray and white to create the tea sleeves.  We decorated the sleeves with lacy edged circles.  We used a computer to print their names on each circle and added a pair of lovebirds to them.  Everyone was very please with the results.  Thank you Teri as always for the inspiration you give us.

Yesterday I hostessed a cookout here and today we went to a cookout.  Robbie made an awesome potato salad, a to-die-for cherry pie, and a yummy blueberry one.  I made a delicious cole slaw and was surprised to discover that my food processor is much more efficient at shredding cole slaw than my Kitchen Aid stand mixer is.   

This week my paper crafting activities were experimental and fun, fun, fun.  An e-mail from SEI tidbits included a template for a Father's Day gift box that I just had to make.  Here are some photos of one of the boxes I created.             

side view of Father's Day gift box

front view of Father's Day gift box

The only tricky part of the box was the sides, but other than the sides the rest of the box is quick and easy.  A gift card will fit in it. 

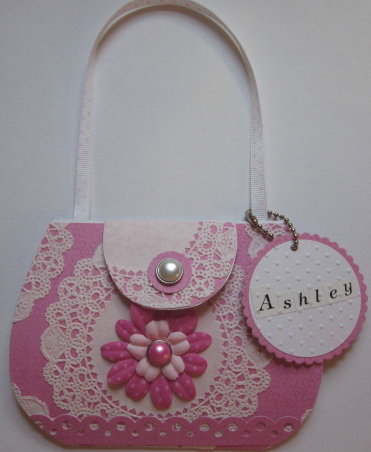
I flipped through magazines and started a file on my computer that I called "Techniques and Ideas to Try".  I decided to make some gift card wallets.  The wallet I made is VERY easy. 

An A2 card measures 4.25" x 5.5" inches.  For this first card I cut 2 patterned tag weight papers so that they measured 4.25" wide by 11" long and scored them both at their 5.5" line.  I used Scor-pal tape to back them together and folded them. 
Here's the card.  Peggy I think these cards will be perfect for the nieces and nephews.  I plan to make others for birthdays and other holidays.


And here's the inside of the card.  The twine holds the money in the wallet.


I wanted to make some graduation wallets too.  I have some copy weight graduation paper that is 8.5" by 11".  I wanted the hats to be facing up so I cut the paper so it was 4.25" x 8.5".  I backed it up with some "sky" paper and folded it so that it now was 4.25" x 4.25".  Dollar bills fit perfectly inside the card with room to spare.  I plan to use standard A2 envelopes for the cards so that no extra postage will be required for this square card.

If you want to make these wallets I suggest that you either use 2 pieces of tag weight paper or one piece of tag weight paper and one of copy weight paper.  If you only have copy weight paper that you want to use sandwich some white tag between the papers.

One of the other paper crafts I created this week were clothespin pinwheels that I saw on one of Martha Stewart's web sites.  I clipped one of them onto my lamp just so you can see it.  We clipped them to the umbrella at our outdoor table.  We'll use them again on July 4th and at our cookouts too.


That's it for today.  Talk with you again soon.
Carol

Saturday, May 21, 2011

Denami Designs Chickie Stamps

Hi Everyone!


Today I played with a few of my Denami Designs chickie stamps. I just adore those little chickies and am slowly collecting the ones I love the most.


If you've ever studied a graduation hat you know that there's usually a "button" holding the tassel in place. I stamped a Denami Designs chickie graduate onto some white tag, colored the image, used a ¾ circle punch to punch it out, and used it to hold the tassel in place on the hat on my card.

I was thinking of one of my friends that I haven't seen for ages and decided to make her a card. I used 3 of the Denami Designs chickie stamps on it: hey chickie, chickie with a flower, and best friends chickie. I used the smallest lacey nestability for the background "flowers" for the chickie images.


I stitched the leaves and stems for the flowers. The "thinking of you" text was created with a clear stamp from Lawn Fawn's Sophie's Sentiments set.

Have a great night!
Carol

Thursday, May 19, 2011

Black and White Challenge

Hi Everyone!


I cannot believe that it's yet another gray day outside. Everything feels so damp and raw. I may have to break down and turn the heat on for a while.


Well, it may be gray outside, but it's black and white inside. Today is the first day of Impression Obsession's Black and White Challenge. The challenge starts today and ends next Wednesday night at 10 PM EST.


If you read my post yesterday you know how excited I am to finally know how to create my own rosettes. Last night I played around with different widths and lengths of paper and created a little stash of rosettes. Then I remembered that the Black and White Challenge started today so I created even more rosettes, but this time I used black and white paper. I must say black and white makes a stunning card.


The paper I used is from the Me & My Big Ideas 12" x 12" Black and White collection. The layering paper I used is flocked which adds a nice texture to the card. The text is from Impression Obsession's B5423 Blooming Spring wooden stamp. I used foam tape to attach the text to the card so that I looks like a little sign standing in a garden of blooms.


Be sure to check out the black and white creations done by Impression Obsession's design team as well as the black and white creations done by other customers. Please leave each of us a comment. We LOVE comments.


Have a great day!
Carol

Wednesday, May 18, 2011

A Patriotic Display

Hi Everyone!


About once every 4 to 6 weeks I change the displays in our home to reflect an upcoming holiday or season. Right now I have a patriotic theme going and there are touches of red, white, and blue throughout the kitchen, dining room, and living room.


Remember the pinwheel bouquet I had on my table to welcome spring? Well, I liked it so much that I created a red, white, and blue one the other night. I put some red, white and blue sand in the vase to help anchor the pinwheels.


A couple of years ago I used a printer's tray that had 12 spaces in it to create a calendar for my sister Jeanne. I loved how it turned out and ever since then I have been dying to use printer's trays to create a variety of displays. I think it would be fun to use 4 small trays that could be hung together and have each one represent a different season.

I decided to create a patriotic display so I pulled out some red and blue papers and a few buttons. I picked up a package of K&Company's Americana borders along with some patriotic stickers and got to work. The resulting display is a combination of store bought and handmade embellishments.


The blue stars in the upper left hand corner of the display were inspired by a post written by the oh so incredible Kimber McGray last June on the Scrapbooks and Cards Today blog. Last year I used those stars on cards, gift bags, and a wreath. I use a Sizzix die to cut the star shape, but you could also cut stars from clip art or trace a cookie cutter. The pop dots that are under the stars help make them stronger.


I created the pinwheel that is in the lower center of the printer's tray.  I used a 2.5" square to create it.  The pinwheel's handle is a mini craft stick, but I think I'd like it better with a straw or coffee stirrer. 


The upper right hand corner of the display is my favorite section.  I have wanted to learn how to create the rosettes that you see ever since I first saw one. I wasn't sure of their name so I couldn't look for directions to learn how to make them. The other night I was reading an old issue of Scrapbooks, ETC and on the very last page of the magazine there was a picture of some rosettes and the text read to go to ScrapbooksEtc.com/350 for online instructions.

I felt as if my fingers were all thumbs when I tried to assemble the first rosette, but the second one came together much more easily. The strips I used are 1.25" wide by 12" long. Each rosette is mounted on a 2" circle that I cut with a blue Marvy Uchida circle punch. I covered each circle completely with Scor-tape before I attempted to attach the accordion folded rosette. I could not pinch the rosette the way the picture in the instructions showed, so I gently laid it out on the taped circle and just kept adjusting it until it started to come together. I didn't join the edges together until the rosette was almost done. Robbie and Marie both commented on the rosettes and neither believed I had made them!

I saw a package of tiny "firecrackers" at AC Moore. I studied them and knew I could create my own. I cut strips of paper that were one inch wide and 9" long. I attached a strip of Scor-tape along both of the short sides of each strip and then added a piece of white twine to one of those short sides. Then I rolled up the strip and used the tape at the other end to fasten it together. Easy peasy. I think the "firecrackers" would also make great candles.

So I made some the "Kimber McGray" stars, the rosettes, the fire crackers, and the pinwheel. Everything else on the display is either a piece of border, a sticker or a button. I am thrilled with the way the display turned out and definitely plan to make more of them for other themes.

I have another parent/child program later today and I also plan to work on some graduation cards.
 
Hope you have a great day!
Carol

Tuesday, May 17, 2011

A Card Here, A Card There

Hi Everyone!


I know I haven't posted any cards for a few days so I thought I'd stop by and show a few that are in my files.  I am working on a project that I am dying to share with you, but I need a little more time to finish it.  Between teacher trainings and parent/child programs life is crazy busy right now.  Marie officially starts grad school this Monday so when either of us aren't working I am trying to spend some time with her.  


Here's a  pretty thank you card that I recently created.  Turn it sideways and you'll recognize the sketch that I use quite often.  3 of something going across or in this case down the card.  The papers I used are from K&Company's Sweet Nectar collection.  Thanks, Toni!  You gave me that paper. 


I picked up several "Celebrate" paper pads from Me  & My Big Ideas at HomeGoods a few weeks ago.  It's a pretty cool collection that comes with 6 different die cut pages that I used for embellishments.  I am not especially wild about some of the papers in the collection that have words and letters on them that are either upside down or backwards, but I love most of the other papers and I really LOVE the die cut pages.  I decided that the papers with the upside down and backwards words are perfect for some of my early childhood teacher friends who see words written that way all of the time.  My friend Patty and I agreed that sometimes we saw numbers or letters written backwards so many times that we had to look at the alphabet hanging over the chalkboard to see which was the correct way for them to be written. 


Here are a few of the cards I created:


I put pop dots behind the embellishments to add dimension to the cards. 

I have a parent/child program later today, but for now I am going to work on my project. 

Have a great day!
Carol


Friday, May 13, 2011

Congratulations Allison!

Hi Everyone!

Finally blogger is up and running again.   I wanted to post this blog yesterday, but couldn't do it until blogger was back in service.

Yesterday Marie attended her best friend's, Allison, Pinning Ceremony at Worcester State College. A Pinning Ceremony is a welcoming of newly-graduated nurses into the nursing profession. We are all very excited for and proud of Allison.


Marie used a dress card template from Paper Crafts magazine's April/May 2009 issue to create a card for Allison.  The pink paper you see in the background is not a part of the card. I placed the dress on that paper so that it would be easier for you to see.  Marie cut her dress from white tag and then ran it through a Cuttlebug Swiss Dots embossing folder. She free cut a collar and some pockets and adhered them to the card with pop dots. The stethoscope, pin, and nursing instruments are stickers.

I searched and found a link for the dress pattern.  It's such a versatile pattern and could be used for any kind of dress such as a First Communion one, a uniform, etc.
Http://www.papercraftsmag.com/images/stories/magazines/paper_crafts/MarchApril_2009/J6-j7pattern.pdf


The sketch I used for my card is one I turn to again and again. The paper is from the dcwv Cotton Bloom Stack. Thanks Peggy! I love this paper and have been using some of it nearly everyday.

The smaller squares are 1.25" and the larger ones are 1.5".  The instruments are stickers. I stamped "congrats" on the clipboard sticker. The message inside of the card reads, "Hope your big day is as special as you are!" and was stamped with a clear stamp from the Hero Arts CL336 Happy Graduation set.


Congratulations Allison!

Enjoy today's sunshine everyone!
Carol

Sunday, May 8, 2011

Happy Mother's Day

Hi Everyone!
This is my second post of the day.  If you are looking for the Denami Girlie Girl blog post it's the one before this one.  I wanted to share some Mother's Day cards with you as my way of wishing you a Happy Mother's Day. 


I used some paper from the DCWV All About Girls Stack for this card.  It was such an easy card to create.  I simply cut the paper and adhered it to a blank card.  Then I use Nestabilities to cut some circles  and a high heels paper punch to cut a pair of shoes to mount on the circles.  I stamped the text on a scrap of paper and mounted it on another scrap before I attached it to the card.  I added adhesive pearls to the heels I had cut with a paper punch and to the heels that were a part of the patterned paper. 


This second card was created with a different section of the same patterned paper that I used for the first card.  This time I paper punched 3 pairs of heels and attached them to the patterned paper.  I again added some adhesive pearls to the shoes to dress them up. 


I cannot remember if I have posted any of these cards.  They were created to coordinate with the paper flower wreaths I made. 

Now a couple of quick stories.  I noticed on aol that they were sharing "true confessions" to mom.  Well, I didn't need to confess my crimes to my mother as she clearly couldn't have missed them. 

When  my brother, sisters, and I were growing up Bobby and I used to play squash every night in the summer.  Our very of squash was played like kickball except we punched the ball instead of kicking it.  We used to use the playground balls that were sold in grocery stores many years ago for probably under a dollar. 

We usually played squash in the middle of Willow Street in West Roxbury, MA, but one day Bobby and I decided to play it in our living and dining rooms.  Our parents weren't home.  I was standing at one end of the living room and punched the ball towards the dining room.  The ball hit my great grandmother's china closet and punched a PERFECTLY round circle in the glass before it shattered all of the crystal glasses on the first shelf which crashed down to the second shelf which crashed down to the third shelf.  Yep, I did it. 
Not sure how old I was.  Definitely old enough to have known better. 

To make matters better, worse??? a few days later I stubbed my toe on a piece of furniture and cut it open.  My mother applied some Methyolade to it.  I am not even sure if Methyolade is even made any more.  It was this bright red ointment that burned when it was applied to any open sore.  Anyway after my mom applied it to my toe she asked me to put the bottle back in the medicine cabinet which was in the bathroom on the second floor in our house. 

We had BRAND new tan carpeting on our stairs and in the downstairs and upstairs halls.  When I say I BRAND new I mean carpeting  that had been installed the day before this incident.  While I was walking up the stairs for some unknown reason I opened the bottle and then accidentally dropped it onto one of the stairs.  Some of it spilled on that step before the bottled bounced to the next step spilling out more of its contents.  I frantically tried to remove it...with the heel of my slipper.  Then I raced up the stairs smearing more onto each step and onto the hall rug.  Yep, I did it.

Last story.  When my mother was 39 years old she thought she was going through the change.  It turned out that she was pregnant with twins.  Paula and Pam were born when she was about 40 and I was 10 years old.  At some point my parents decided to move Paula and Pam's cribs into the room that Jeanne and I had shared and I was given my own room.  This room had been called the "Train Room" and had wallpaper with old fashioned vehicles on it.  The wallpaper was fairly new.

Well, I was very excited about my new room.  I applied some kind of liquid brown furniture polish to my desk and vigorously rubbed it in.  I didn't notice that as I rubbed the polish onto the desk I was also brushing the cloth against the wallpaper.  Suddenly I looked and saw a streak of brown polish running along the wallpaper at the top edge of my desk.  This time I tried to hide my crime.  I lined books up against the wall.  I must have lined up too many books or something because my crime was detected by my parents.

So today I shared those stories with Robbie and Marie and asked if they had any "crimes" that they wanted to confess to me.  They both denied ever commiting any crimes.  Hmmm....
Happy Mother's Day to all !

Talk to you again soon.  It's going to be another busy week.  Teacher training tomorrow, 2 parent and child programs on Tuesday, and another teacher training on Wednesday.  In addition to paying the bills, those trainings help support this paper crafting addiction of mine.

Carol

Hey Chickie

Good Morning Everyone!


Happy Mother's Day! Today Denami Designs is launching its Girlie Girl Blog Hop.  Here are the blog hop details:

The blog hop starts on May 8 at 6 AM, PST. However, you have until May 9,11:59 pm PST, to leave comments on all the blogs (to be eligible for a prize).
The purpose of the blog hop is to be inspired by fun DeNami Design creations and to have the chance to win mini shopping sprees on the DeNami Design website!
Denami Designs is giving away THREE $20 gift certificates to their website! They will be giving away one gift certificate to a random participant (DT members not eligible) and they will also be giving away TWO gift certificates to TWO people who comment along the hop!


Introducing the "hey chickie" line of purse cards! I use Denami Designs hey chickie, chickie girl, and chickie with flower stamps on my card. Notice the "hey chickie" logo on the purse clasp. The brown circles that highlight the chickie images were cut with a lacey circle Nestability die. Lace and polka dotted patterned paper add to the girlie girl look of the purse.


I wanted both sides of the ribbon to have "Happy birthday" text so I used Scor-pal tape to attach the ribbon back to back before I attached it to the purse.  The wonderful variety of Denami Designs chickie stamps means there are more "hey chickie" purse cards coming soon.

You may have arrived here from the blog of Ayana Posadas. If you didn't you can always start hopping at the DeNami blog. From my blog you will be hopping over to the blog of Chrissie Tobas.


Have fun!
Be sure to leave a comment at each blog that you visit.

Please stop by and visit me again soon.
Carol

Thursday, May 5, 2011

Your Favorite Impression Obsession Image Challenge

Good Morning Everyone!

The Impression Obsession Pick Your Favorite IO Image Challenge starts today.  Be sure to visit their web site to view the Design team's cards as well as cards that customers submit for the challenge. 

I am not sure when or where my fascination with pitchers and wash basins began, but I suspect it may have evolved when I was young and was a fan of the Little House in the Big Woods series. I do know that my friend Linda gave me a gorgeous yellow spatterware wash basin filled with silk daisies for a bridal shower gift. I do remember my mother made iced tea in a white milk glass pitcher. She filled the pitcher with tea bags, hot water and butter knives. As a child I wondered why knives were needed to make iced tea!


When I saw Impression Obsession's Wash Basin wooden stamp I knew I had to add it to my collection. The beautiful shading on it makes it an image that can stand alone on a card. It can also be filled with flowers.


I stamped the wash basin with some brown Color Box ink, embossed it and ran it through the Swiss Dots Cuttlebug embossing folder. My mother's iced tea pitcher had raised white dots on it. I stamped the daisy that is on the pitcher repeatedly on some yellow tag, embossed them, and fussy cut them out. I added a tiny brown brad to each of their centers.


My papers are all from SEI. The "tablecloth" is a 2.5 inch square of paper that is folded diagonally. I fussy cut the wash basin and then used foam tape to attach it to the layering papers. The daisies are attached with glue dots.


I left the inside of the card blank. I feel this would make a nice get well, thank you, birthday, or all occasion note card.


Have a great day!
Carol

Wednesday, May 4, 2011

Sunny Day from SEI

Hi Everyone!

I have been creating so many cards for this Saturday's craft fair that I feel as if I have turned into a card machine.  I am having a blast and have tons of ideas so I probably won't be getting much sleep in the next few days.

There are cards and gift bags all around me.  Every now and then I stop, clean my stamps and put everything I have used away.  Then I take a photograph of each card, add my logo to the back of it, put each card and an envelope in a clear card envelope, and price the card.  I also adjust my inventory at that same time so that I can see which categories of cards I still need to create. 

While I was at the Creating Keepsakes Conference last week I purchased one each of some of SEI's newest 6" x 6" paper pads.  The pads I purchased are called Sunny Day, Couture, Corinne, and With All My Heart.  I also purchased the Corinne and Sunny Day die-cut accents.  Now I wish that I had made some other SEI purchases, but happily I can do that online. 

This morning I mainly worked with the Sunny Day pad, but I did use one piece of paper from the Corrine pad.  I mostly worked with sketches that I have used on other cards.  I am creating gift bags with sets of 4 cards in them and a coordinating Mother's Day card and tag. 

I used "A Country Welcome" wooden stamp to create the "Thanks a Bunch" text on this first card. The card is an A2 Card.  The layering paper is cut so that it measure 5.25" across and 4" down.  The Sunny Day  paper  was cut to measure 1.75" x 1.5", 3" x 1.75", 1.75" x 2", an d 3" x 1.75.  The flower accents are Sunny Day die-cut accents.  The window box is attached to the card with foam tape.


I used a Martha Stewart border punch to cut the edge of the top Sunny Day paper on this card.  Aren't the flowers on this paper gorgeous!

You've seen me use this sketch lately on other Get Well Cards.  I love the simple look of it and it's an easy card to create.  I paper punched the flowers, put them on a foam mat, and pressed a stylus in the middle of each of them to make them pop up.  These are the flowers that I call 'Flowers a la Susan' since my friend Susan DeMuth from Shapes, ETC. taught me this technique.  I added tiny pearls to the center of each flower.


The sketch for this Happy Birthday card is another one that I turn to again and again.  The cupcakes were cut with a Martha Stewart paper punch.  The white paper they are mounted on is a 1.25" square and the red square measures 1.5".  I added a rhinestone "cherry" to each cupcake after I studied the photograph of this card.  The cherries added a little bling to the card. 


I thought a quilted card would be a nice addition to this collection.  Each square on the quilt is one inch.  The quote about mothers is stamped with a stamp from PaperTrey Ink's Quilter's Sampler clear stamp set. 
The "Happy Mother's Day" text was created with a wooden stamp from the Lockhart Stamp Company.
Now I just need to create a bag and gift tag for this set.

Hope you are planning to do something fun on this dreary day.  Stop by tomorrow to see the fun card I created for the current Impression Obsession challenge.

Have a great night!
Carol

Sunday, May 1, 2011

Happy First Communion Lauren and Ashley

Happy Sunday Everyone!

Yesterday Toni and I attended the Creating Keepsakes Conference in Manchester, New Hampshire.  It was AWESOME!  We attended 3 fantastic classes and had a blast shopping at the vendor faire.  One of the classes we attended was called Greetings by Design by Heartstring Designs.  It was such a great class.  We made one ribbon handled purse card, one clutch purse card, and one sport card.  My favorite was the ribbon handled purse card. 

My friend Kathy asked me to create some cards for her grandchildren, Lauren and Ashley, who will be making their First Communion this Saturday.  I talked with Kathy and decided to make each of the girls a ribbon handled purse card.  Ashley's favorite color is pink so I made her a pink purse.  Lauren's favorite color is purple so I made her a purple purse.

I began by cutting a sheet of  patterned pink paper and a sheet of patterned purple paper so that they measured 6" across and 10" down.  I cut some small doilies that I found in the cake decorating section at Michaels in half and left others whole.  I sprayed some Elmer's glue on the back of them and attached them to the papers.  I think the spray glue was perfect for this project because I wanted the doilies to lay flat on the paper. 

Then I traced one of the templates we were given in the class onto each sheet of paper.  I cut out the patterned paper and then traced the template onto some white tag to use as a liner for the cards.  I adhered a 12" piece of ribbon to the patterned papers to create the handle for each card.  Then I attached the liner to the card. 
There's a piece of velcro under the purse's clasp.  I attached a decorative brad to each clasp and a silk flower to each purse. 

I used some letter stickers to spell out Lauren and Ashley's names on some white tag.  Then I used my blue circle punch to punch out the white circle.  I punched out 2 each of decorative circles that matched the purses and attached them back to back before I added the white circles.  I ran the circles through a Swiss Dots embossing folder, punched a hole in it, and threaded a beaded key ring through it.  Then I attached a key ring to each purse. 

Kathy can write a message inside each purse and if she wants could attach a gift card in them too. 

Here's another purse I created today.  I plan to make a key ring that says "Happy Mother's Day" and attach it to the purse. 

Happy First Communion Lauren and Ashley!

Have a nice night everyone.
Carol