Search This Blog

Sunday, August 29, 2010

More Word Cards

Hi Everyone!

I feel as if I have been playing Scrabble, Upwords, or maybe even Jumble. I have been sitting here playing with some leftover red epoxy alphabet stickers and attempting to transform them into words. I like playing word games and was up for the challenge. I was able to make "happy" and that wiped out the "p's" and "merry" wiped out the "r's." I also made "wish", "fun", and "xmas".
Here are photographs of the cards I created today.


Have a great night!
Carol

Saturday, August 28, 2010

Word Cards

Hi Everyone!

I have seen variations of the first card I am going to share with you today in some of my books and magazines. While I was organizing my alphabet stickers last night I came across a couple of packages of Heidi Grace Punchboard Alphas that I purchased eons ago and haven't used and decided it was time to use them. The letters are fairly large so I decided they should be the focal point of the card. Happily the quantity of each letter is listed on the back of the package. In addition to the alphabet there are numbers and punctuation marks included in the package.

Today's first card is 4.5" x 6.25" which is still a standard size, but is a little larger than the cards I create most of the time. I cut a piece of 12" x 12" lime green tag into a 9" x 6.25" piece and scored and flolded the 9" side at 4.5". This size could accommodate 4 of the letters from the package when I arranged them whimsically.

There's a story with the first card. Toni will say there's always a story. I could have gone to bed without making a card. I should have gone to bed with out making a card. But I didn't want to go to bed. I wanted to make just one more card....
The letters are adhesive. I started out by adhering 3 letters and a candle sticker to scraps of paper from the K and Company Citronella 12" x 12" paper stack. I mounted them on a 4.25" x 6" piece of paper that was from the same paper stack and attached the paper to my card. Looked at it and was major disappointed. I peeled the candle sticker off the card, cut off the flame so I could use it and made a candle that coordinated with the background paper on the card. I put glossy accents on my candle to make it look "waxy". I studied the card and still didn't like it at all. The letters were lost on the card and I wanted them to be the focal point of the card.

So I very slowly and very carefully peeled the green paper that the letters were mounted on off the card. I forgot that the glossy accents were still wet. I touched that piece of paper, was startled that it was "wet" and sort of jumped back and my sticky wet finger landed on the upper left hand corner of the card. Tried to peel the paper with the "w" on it and ended up bending the "w" which cracked it and exposed the white core of the paper. So now I had a mess in front of me.

I threw away the "w". I also threw out the candle because you could see my fingerpring on the glossy accents. Happily I had a second "w" because I had 2 packages of the letters. I mounted that "w" on another scrap. Then I layered each of the scraps on some blue tag. That instantly made me happy because that simple act made the letters pop out. I made a new candle, but didn't apply the glossy accents yet. I attached the mounted letters to the card and much happier with the look of it. But, there was a small sticky glob in the left hand corner of the card. So I took out my birthday embellishments and covered the "glob" with a balloon. One balloon looked good but I wondered if 2 would look better. Yes. Then I added a party hat and a gift, and then another gift. I liked my card. A lot! Added glossy accents to the candle and went to bed!

Got up this morning and of course my glossy accents had dried. I am so happy with the card. Last night I made 2 mistakes. I shouldn't have made a card as late as I did. More importantly I should have laid out the card before I glued everything down. Today I laid out 3 more cards.


"It's a boy" is backed on some Debbie Mumm baby boy paper. The embellishments are also from Debbie Mumm and coordinate with the paper.

"Hello" is backed on paper from dcwv's Songbird 12" x 12" paper stack. The silk flowers and brads I used are from my stash.


Happily I planned this last card before I did any cutting and gluing. I wanted to spell out the word "happy". I created a card that fits in a business size envelope. I cut a piece of tag so that it measured 9" x 7.5". I scored and folded the 7.5" side at 3.75". Then I cut a layering paper so that it measured 8.75" x 3.50. I used embellishments from my birthday drawer to decorate the card and small Mrs. Grossman stickers to spell out "birthday".
Have a great night!
Carol

Friday, August 27, 2010

Friday's Cards with Flowers

Hi Everyone!


This morning I decided to create cards with some of my silk flowers. I used one of my Sizzix dies called "Flowers & Vines with Stem" to create the stems and leaves for those flowers. I worked with a sheet of sky paper from K and Company's 12" x 12" Citronella paper stack and a sheet of leaves paper from dcwv's 12" x 12" Songbird paper stack.


I've always liked the look of the 1.75" squares on these cards. I used my corner rounder on 2 of the opposite corners on each square. "Thanks" and "hello" were created with Maya Road rubons.


Have a great night!
Carol

Thursday, August 26, 2010

More Birthday Cards

Hi Everyone!

I love everything about Christmas especially our family traditions, but for some reason I keep putting off working on Christmas cards. It may be because I know once I get started I won't want to work on anything else. It may be because I dislike snow and ice so much that I don't want to think about the winter holidays. My friend Susan suggested that I create more birthday and thank you cards for her co-workers so that is what I am doing.

I used paper from Martha Stewart's Classic Woodland and Classic Botanical 12" x 12" paper pads to create these first 2 cards. The papers are layered onto blank A2 cards which measure 4.25" x 5.5". I cut some white tag so that it measured 4" x 5.25", placed it in a dotted embossing folder and ran it through my Cuttlebug. I cut the red and aqua papers to that they measured 4" x 2" and adhered them to the white paper.

I used Jeanette's, the owner of Stamped Designs in Dover, NH, bow making technique to create a bow for each card and then used Scor-pal tape to adhere the ribbon to the layering paper. Then I attached the layering paper to the A2 card.

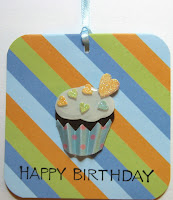
The scalloped and plain circles on both cards were cut with circle Nestabililties. I put the white circles in the dotted embossing folder and ran them through my Cuttlebug before I attached them to the scalloped circles. "Happy Birthday" was stamped with a Northwoods Wooden Stamp. The cupcakes are K and Company embellishments.


I tend to use A2 cards for most of my cards, but I created the blank card for this next card. I cut some brown tag from the SEI Moravia collection so that it measures 4" x 11" and scored and folded it at 5.5". This means I was able to create 3 blank cards from just one sheet of 12" x 12" paper.


Hint: when you are cutting paper that you plan to fold be sure to cut it so that you will be folding parallel to the grain of paper. To determine the grain of a 12" x 12" paper hold the edges of the paper and gently bend it in the middle. You will feel the paper resisting when you bend it in one direction and will find the other direction bends more easily. That is the direction you will want to use when you are creasing and folding your paper. Your crease and fold will be neater when you do it that way and your paper will not crack. Try it both ways so that you will understand me.

I cut some white tag so that it measured 3.75" x 5.25" and adhered it to the card. I cut some brown tag so that it measured 3.5" x 5" and centered it on the white tag.

I am guessing that many of you are like me and cannot throw away your paper scraps. I cut the 9 rectangles that you see on the card from scraps from the SEI Happy Days paper collection. Each rectangle is 1" x 1.5". I used my Northwoods wooden "Happy Birthday" stamp to stamp the message onto a scrap of white tag and then I adhered the message to my card.

You can use your scraps to create a similar card and add any sentiment you want to the card.

Have a great day!
Carol

Wednesday, August 25, 2010

Birthday Cards

Hi Everyone!


On Monday I wrote about using sketches to help plan a card. Today I looked at just one sketch and used it to create several cards. Simply by changing the embellishment on each card, I gave the card a different look. I used PiggyTales paper on all of the cards. The paper I used is two sided and what's nice is the the back coordinates with the front so I used the front for the top of each card and the back for the bottom of each card. I adhered some twill ribbon between the top and bottom papers.


The first 3 cards were created with "Haystack" paper from PiggyTale's Little Boy Blue collection. I don't think this paper is still available, but remember you can use any paper on your cards.


Hint: Attach the ribbon to your papers before you attach them to your blank card so that you don't see the ends of the ribbons.


The top section of each card measures 2" high by 5.25" wide. The botom section of each card has the same measurements, but the ribbon going across it covers about 1/2 inch of it.


These 3 cards were created with "Big Teeth" paper from PiggyTale's Little Red Riding Hood collection. This paper is still available from PiggyTales. Notice how the red twill ribbon pulls out the red in the stripes. I like the look of the red ribbon better than the look of the cream colored ribbon on the next card.


The flowers and chipboard embellishments are from my stash.


I am hoping that they quick-to-create cards showed you how easily you can change the way a card looks.


Talk to you soon.
Carol

Tuesday, August 24, 2010

Christmas Notepads


Hi Everyone!

First some housekeeping...

I know that there are many new people reading this blog. Welcome! I am glad that you found us. Please everyone leave some comments to share your thoughts about the cards and other paper crafts, to ask or question, or to let me know that you'd like me to post a particular kind of card or papercrafting activity. The first time that you try to post a comment you will be asked to set up a free google account if you don't already have one. The prompts will tell you exactly how to do it. The comments help me know that someone is actually reading the blogs that I post for you.

If you look along the left side of the blog you will see a list of followers. To become a follower you just need to click on "Follow".

If you want to see a larger image of any photograph on my blog just click on the picture to enlarge it and then click on the back arrow in your browser to continue reading the blog.

I try to post a blog every 2 or 3 days. Sometimes I post even more often than that and every now and then I post a little less often if my life is extra busy.

And now onto today's blog...

I know that many of you own a Cuttlebug, Sizzix, or other die cutting machine. I recently purchased a new Sizzix die which as you know works with most major die cutting machines. The new die is called "Album Cover & Page" and is a standard size die. You can cut chipboard, tag, scrapbook paper, etc. with the die. I decided to make some Christmas notepads for people to toss in their purses when they go shopping.


I cut 2 pages out of chipboard to use for the back and front covers of each notepad. I cut out 4 pages of patterned paper for each notepad so I could cover both sides of the front and back covers. I cut 12 pages out of white tag to use for the pages in the notepad. I chose to use tag instead of copy paper so that the pages would be sturdier.


I rubbed a dye ink pad along the side edges of the chipboard to give them some color. I also brushed that same dye ink pad along the front and back edges as shown in the photograph. I did that in case I didn't line my papers up exactly when I covered the chipboard. You do not need to brush on as much ink as I did. I got a little carried away with my rubbing! Dye ink dries quickly, but I set the chipboard aside to dry completely while I adhered Scor-pal tape to the backs of the 4 sheets of patterned paper.


Next I attached the patterned papers to the inside and outside of the front and back covers. The Sizzix die cuts 3 holes in each page so I lined up the holes so that they matched and ran a piece of 1/8" wide ribbon through each hole and tied each piece into a little knot. The ribbons are tied loosely so that the pages can turn easily or be untied to add more pages to the notepads.


I added embellishments to the front covers just for fun.

The notepads I created today are for Christmas lists, but by using different papers you could make notepads for everyday use.

Talk to you soon. Have a great night!
Carol

Monday, August 23, 2010

Moravia from SEI

Hi Everyone!


This rainy Monday isn't going to get me down. The air feels so awesome today. It's actually a little chilly inside of my house. What a welcome change from the horrible humidity that has summered with us.


I recently purchased a book that I totally love. It is called Joy of Card Making, Collector's Edition from Paper Crafts magazine. There are photographs of more than 360 cards in the book along with pictures of the layouts used to create every card. Each layout was used at least 3 times and all of the layouts are shown again at the end of the book.


Sometimes I've seen card making layouts called "sketches" and other times I have seen them called "recipes", but they are both the same thing. You've seen blueprints for building a home. Well, a sketch is a blueprint for creating a card.


The sketch for this card showed 4 rectangles that were the same size arranged the way you see them on my card and the sentiment was in the lower right hand corner. I chose the paper and the sentiment, but I used the sketch to help my plan my card.


You can find card making sketches on the Internet, in a special issue from Paper Crafts magazine called "Go to Sketches", in the book Joy of Card Making, and in other magazines and books. You can use the same sketch over and over again and simply by changing even just the paper that you use, each card will be different.

I've had the Moravia 12" x 12" paper stack from SEI for a long time. I have created a variety of gift bags and quilted note cards with it. I recently purchased the brads, ribbon, alphabet stickers, stamp, rub-ons and stickers that coordinate with that paper. This past weekend I played around with the paper and embellishments. The "blank card" I used for each of these cards is an A2 card that I created with Moravian paper. I cut the paper so that it measured 5.5" x 8.5". I used my Scor-Buddy and scored and folded the 8.5" side at 4.25". Every paper you see layered onto the cards is from that same paper stack.


"Best Wishes" was stamped with a stamp from the Moravia collection. The brads are also from the Moravia collection.


I haven't decided what sentiment to use on this card. The brads and ribbon are from the Moravia collection.


I used one of my circle Nestabilities to create the circles on this card. You could also use a paper punch. "Happiness" is a rub-on from the Moravia collection.


Have a great day!
Carol

Thursday, August 19, 2010

Gift Tags

Hi Everyone!

I saw some cute commercially made gift cards in the store the other day. I purchased one of them so I could hang it in my work space for inspiration. As I sat here looking at it, I decided to make some gift cards of my own.

Cut some tag weight paper so that it measures 3.25" x 6.5". Score and fold the 6.5" side at 3.25". Use your corner rounder to round all 4 sides of your card. Punch a small hole at the top of the folded edge. Cut an 11" length of ribbon that is 1/8" wide. Loop the ribbon in half and thread it through the card. Pull the loose ends of ribbon through the loop. Stamp a message on the card and use stickers or other embellishments to decorate it.

I used 3 dimensional stickers on some of the cards I created and standard stickers on others. I think that the 3 dimensional ones look the best. Silk flowers look good too.

That’s all for today. Talk with you again soon.
Carol

Saturday, August 14, 2010

Saturday's Cards

Hi Everyone!

A few weeks ago I took a great class at InkAbout It in Westford, MA. We used Memory Box stamps to create Christmas cards. One of the stamps we used is called, "Birch Trees". Even though we were making Christmas cards and I wasn’t yet in "Halloween" mode, when I stamped the image and saw trees in a woods I immediately thought of a poem I used with my Kindergarten students, "In a dark dark wood..." Along with the poem an idea for a Halloween card came into my head. That idea has been hovering in the back of my mind because I needed to purchase some black alphabet stickers before I could create the card. I’ve been in and out of the craft stores for weeks and never once thought about the stickers until yesterday. I found exactly what I wanted.

So I cut some orange paper from my stash and used some black ink to stamp the birch trees. I stamped slightly on top of the first stamped image to make the trees taller. I stamped another partial set of trees next to the first set and then stamped slightlly on top of them to make them taller. I affixed the alphabet stickers to the paper and then attached the paper to the card, held it up to admire it and...it was crooked. I ever so carefully peeled the paper from the card, placed it again, and...it was still crooked. I peeled it off again. I measured the paper. It was only the slightest bit off, but it bugged me. Big time. So...I trimmed the orange paper and of course that made it smaller. I placed it on the card, got an idea, and trimmed it even smaller. I like it! It works for me. I thought about adding a paper punched witch, bats, or ghosts...but...the card doesn’t need it. It’s simple, but effective. And now as I look at my card I don’t see a dark dark woods...in my mind I see a winter woods! With some wintery words on it. That card will have to wait for another day, but it’s filed in my memory!


MaryBeth and I attended the Creating Keepsakes Conference in Manchester, New Hampshire a few months ago. We saw some chipboard robots from My Mind’s Eye, loved them, and purchased them. Mine have been sitting in a container for months. I saw them the other day and decided to play with them. I’ve created 5 cards with them so far today. Each card is only slightly different from the previous one. I didn’t buy any special paper to use with the robots. I have tons of scraps that are most definitely user friendly. Super easy cards to create...trim the papers, add some ribbon, attach the paper to the card, affix the robots and other embellishments to the card, stamp a message, attach it to the card, done!

Have a great weekend!
Carol

Wednesday, August 11, 2010

Halloween Fun


Hi Everyone!


I have more Halloween cards to share with you today. I didn’t use any special techniques on them, but hope that the photographs will trigger some ideas for you. I’ll quickly fill you in on the materials I used.


Over the past few months I’ve used Impression Obsession’s "Enjoy the Sweet Things in Life" stamp on cards with strawberries, cherries, summer drinks, ice cream, cakes, and cupcakes. It’s also a great stamp to use with Halloween candy and other treats. I used a pumpkin nestability to help me create the pumpkin that has the "sweet things" message on it. The candy corn border is from that same package of borders that I used on yesterday’s cards. The candy apple and piece of wrapped candy are Recollections stickers.


"Happy Halloween" and "Trick or Treat" were stamped with Northwoods wooden stamps.


I used a Sizzix picket fence die to create the fences. The pumpkins and Dracula were cut from some K and Company Halloween paper. The witch that is flying across the moon was punched from a Martha Stewart paper punch. The other embellishments are mostly Recollections stickers.


I’ve been having so much fun creating Halloween cards this year. I just lay out my supplies on the table and play. Try it!


Have a great night!
Carol